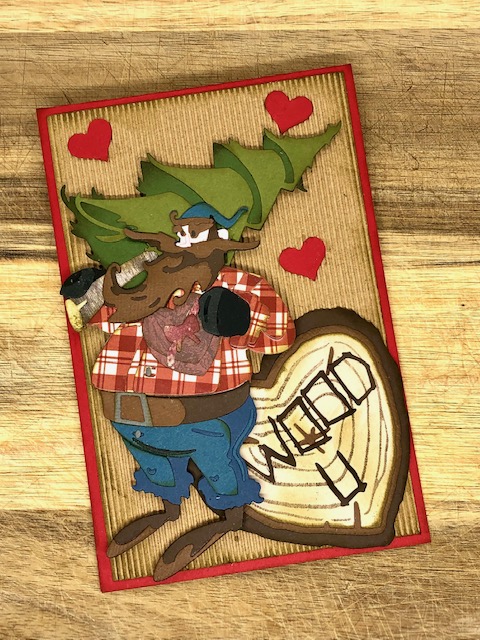
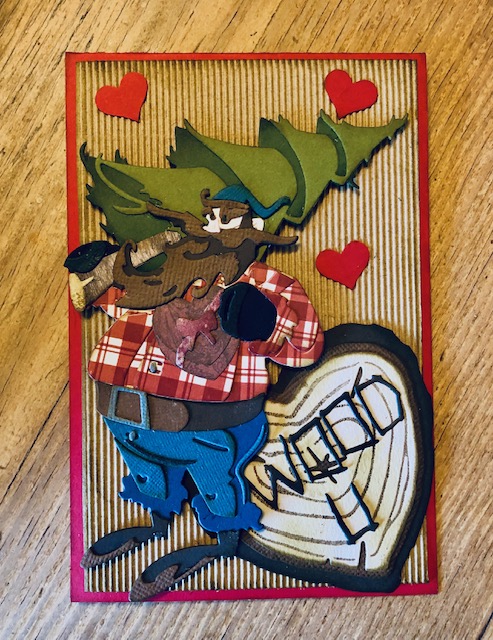
Hello everyone! I’m back with an idea for your Valentine this year. I’ve seen several folks turn the Woodland Santa into a lumberjack and with the new wood slice die I thought he’d be cute as a Valentine. Turning Santa into a lumberjack, particularly if you are making several, is a labor of love, so keep that in mind if you decide to make more than one. I ended up making 10 for a swap, but I spread it out over several days.
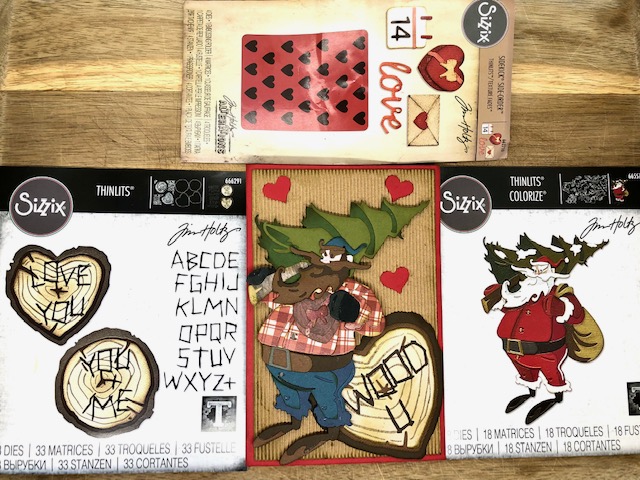
- Woodland Santa- Sizzix Thinlits #665573
- Wood slice- Sizzix Thinlits #666291
- Valentine- Sizzix Sidekick- Side order #662710
- Also used Ranger Distress Ink in Gathered Twigs and a Stampin’ Up! mini heart punch
This card is pretty straightforward and Sizzix has great video tutorials on assembling their Colorize dies. I highly recommend watching them before you attempt putting together your lumberjack. There are a couple of tips I’d like to share that I learned through trial and error.
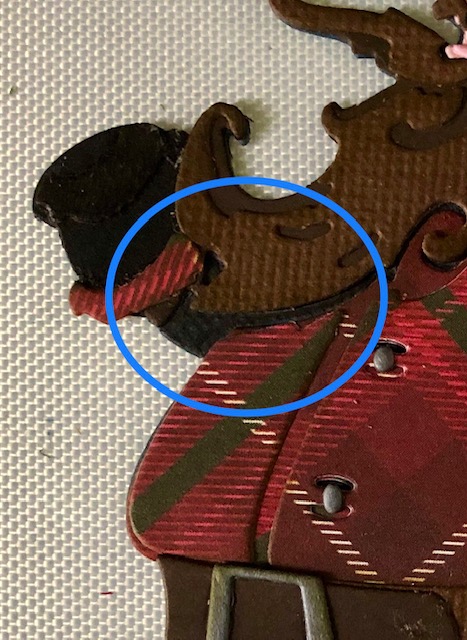
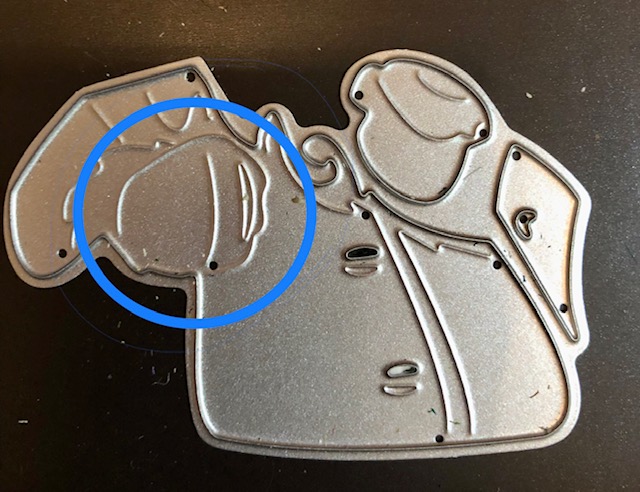
First, there is a large base die in the colorize dies that you build on. When turning Santa into a lumberjack, I recommend cutting two of this base piece, one out of the paper you are using for his pants and one partial one out of the paper you are using for his shirt. The shirt piece does not have to be complete as you will cut off the leg portion along the embossed line, as well as not needing the head portion. The reason for this, is there is a small portion of the base piece that will show through on the finished Santa. I circled this portion on the second picture that I just colored in with a black pen. If you don’t mind coloring it, you can skip this step but I think it looks better in the same paper as the rest of the shirt.

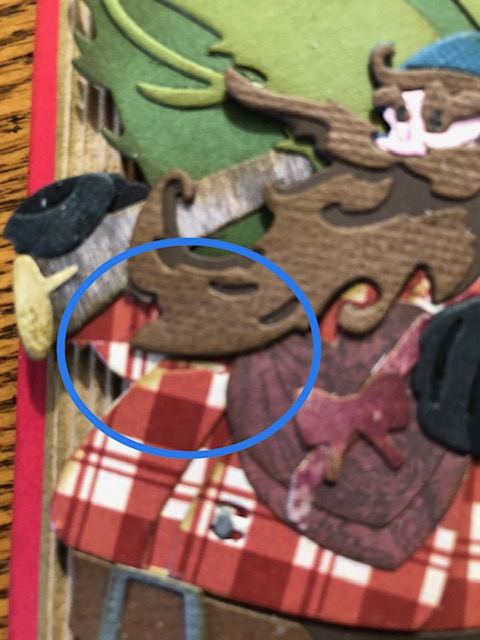
The second tip concerns his left hand (the right when you are looking at him). I wanted my lumberjack to be holding the valentine box from the sidekick die. On the Santa die, this hand is not a separate piece, so you will have to cut the hands out of the color you want them to be. The hand holding the tree is already separate, but the one I have holding the valentine is not so you will have to fussy cut it out. You can see where you will cut as this piece is embossed into the die. Remember to add the Valentine, before layering this hand on top of it.
As you can tell, turning him into a lumberjack requires cutting quite a few alternate pieces, but he comes out so cute, I thought it was worth it.
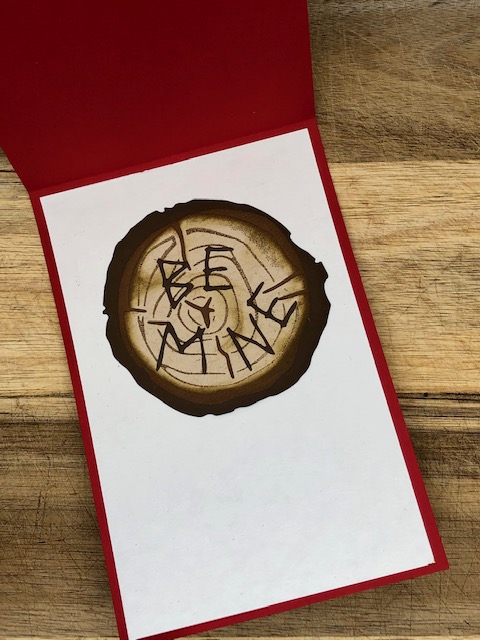
Once you have made your lumberjack and added a Valentine, cut whatever sentiment you want for the wood slice pieces. I used the heart shaped wood slice for the front of the card and the round one for the inside. I layered it and my lumberjack on some corrugated card stock and added a few mini hearts I cut out using a small punch.
Some extra notes:
This card measures 4″ x 6″. I just liked how it looked on this size
I distessed everything using Gathered Twigs distress ink
I hope you like this card and will try it. The Colorize dies do take some patience but if you give yourself time, they come out super cute. Have a great week! -Lisa

Very clever, you’re stuff is always so cute!
LikeLike
Oh my gosh Lisa, this is just too darned cute, not to mention clever. I guess I’ll have to add this to my wish list!
LikeLike