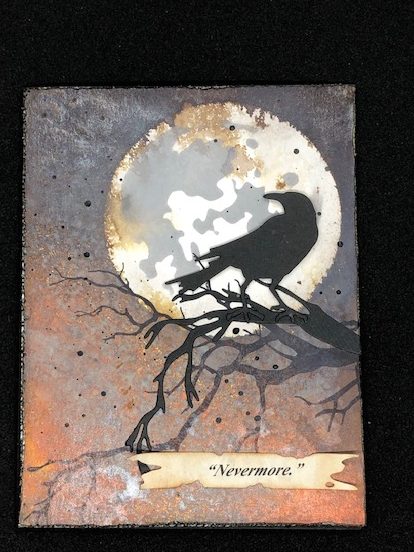
This is another card I am using for my swap group. This particular group is an assembly-only group and I didn’t feel like doing a whole lot of stamping/coloring. This one uses just one stamp, some sprays and some die cuts so I didn’t feel overwhelmed making 10 kits of it. Hope you like it! This is a standard 4 1/4″ x 5 1/2″ card.
Materials used:
- Ranger/Tim Holtz Distress Oxide spray in brushed corduroy
- Ranger/Tim Holtz Distress spray stain in ground espresso
- Ranger/Tim Holtz Distress mica sprays in empty tomb and jack-o-lantern
- Ranger/Tim Holtz Distress inks in Black Soot and Vintage Photo
- Ranger/Tim Holtz Distress Oxide in Hickory Smoke
- Ranger Archival Ink in Jet Black
- Vault Series- Halloween 2021 (665563)
- Mr. Bones Stamp set (CMS345)
- Moon Mask (THMSK01)
- Large funky Floral (664158)
- Fun Stampers Journey silk in black licorice (IP-0143)
Steps:
- I made my background on watercolor paper. I stuck the medium circle from the moon mask down with removable sticky dots and started spraying, starting with the brushed corduroy spray, then the ground espresso, then finally the two mica sprays. I added, sprayed and dribbled with water, drying and dabbing in between water splatters until it looked how I wanted. Each one came out slightly different which is part of the fun =). Once I had finished spraying/drying, I removed the mask and spritzed the moon area to make the ink drift into the moon a little bit.

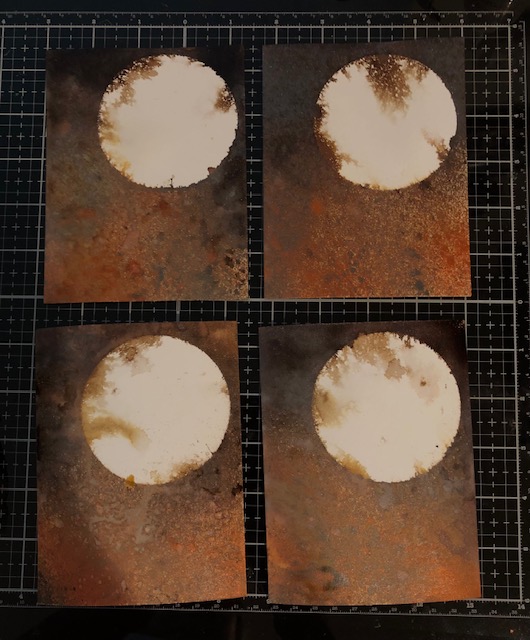
2. Once that part was dry, I laid down the second step of the mask with a removable adhesive dot and inked the stencil areas with hickory smoke oxide. After I removed this mask I went over the edge of the moon a bit with the hickory smoke.

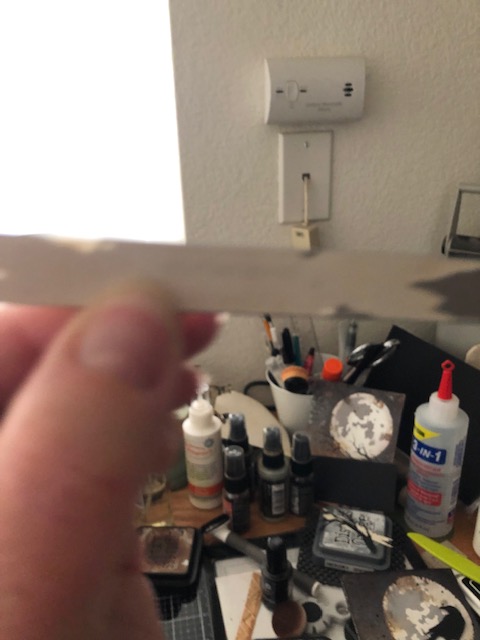
3. Using a stamp positioner, I stamped the branch from Mr. Bones three times in jet black archival ink. It will fade a bit over the mica which I loved, but if you want it to be really black, you may want to emboss the branch with black embossing powder.


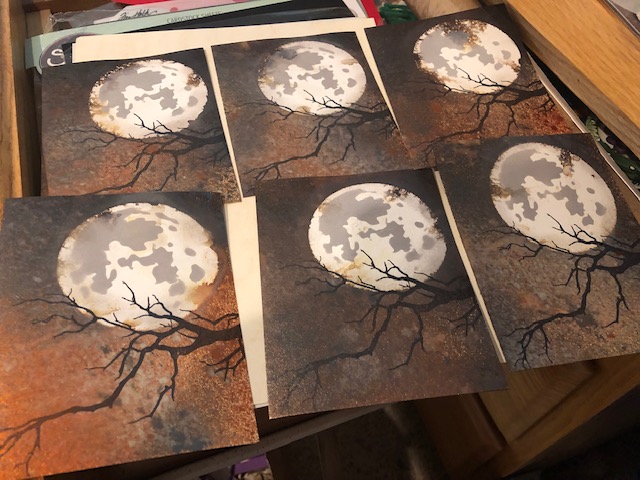
4. I then splattered the black licorice silk over each background piece. If you don’t have black silk liquid, just use black paint or ink and a splatter brush or even a regular paint brush.
5. I cut the branch and two ravens from black card stock. I layered the two ravens on top of each other just to make it a little heftier. I then attached them to my piece. I popped the upper part of the raven up slightly with a small piece of fun foam. I wanted him to pop up a bit but not a lot.
6. I printed a whole page of the word “Nevermore” on my computer (this would make a great stamp though hint, hint stamp gods…lol). I had some printer paper that had a parchment look that was perfect. I then cut out each word using the banner die in the vault set. This die as is was too long for my project. Here is what I did- I lined up the die where I wanted the word to sit by holding it up to the light and cutting one side, then holding it up again to see where I wanted the other side to hit. This will only work, of course, if your paper is thin enough to see through. I hope the pictures help with my description…
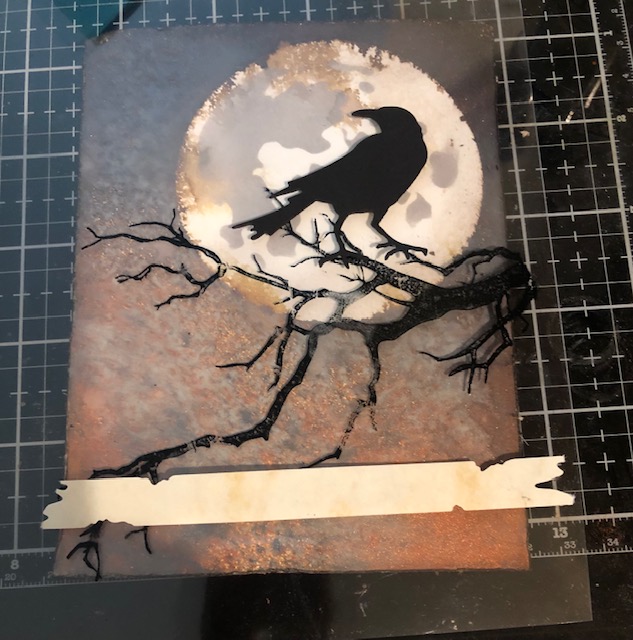


7. I distressed the edges of the banner with Vintage Photo and attached it under my raven. Lastly I distressed all the edges of the card and inked them in Black Soot and attached the whole thing to a black card base.
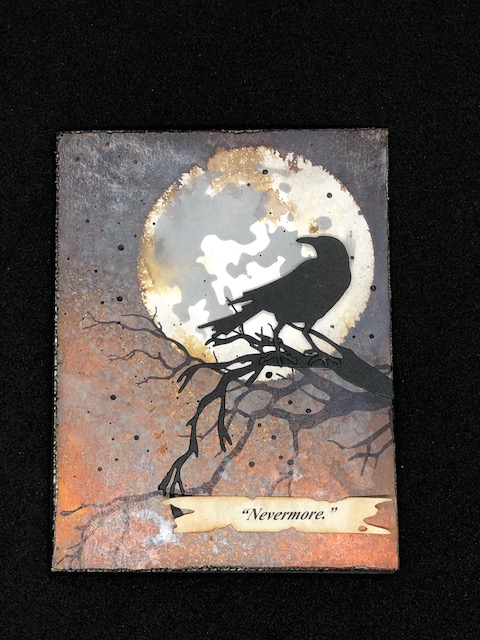
That’s it! Not too difficult but I think it packs a nice, creepy punch. Hope you try it and have a fantastic week! -Lisa

So good!!
LikeLiked by 1 person
I love this card. So glad to be a recipient in the swap group. 🤗
LikeLike
❤
LikeLike