
Materials Used:
- Tim Holtz/Stampers Anonymous Inquisitive Stamp set (CMS432)
- Tim Holtz/Sizzix Splat Die (664159)
- Tim Holtz/Sizzix Colorize Harrison (665218)
- Tim Holtz/Sizzix Funky Trees (665217)
- Tim Holtz/Sizzix Colorize Gertrude (664429)
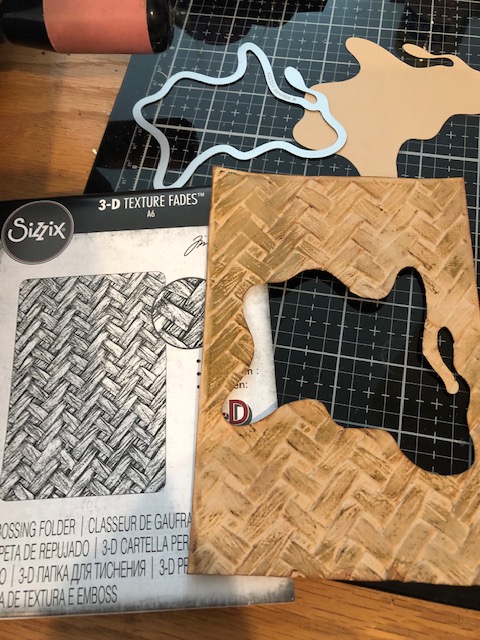
- Tim Holtz/Sizzix 3D Texture Fade (665217)
- Tim Holtz/Ranger Distress Ink in Vintage Photo
- Tim Holtz/Ranger Distress Oxide in Fossilized Amber
- Tim Holtz/Ranger Distress Embossing Glaze in Fossilized Amber
- Embossing Powder in Black
- Journey Glaze for Monocle (similar to Crystal Effects)
- Scrap piece of muslin
- Tim Holtz/Idea-ology Tiny clip (TH94025)
- Versafine Clair ink pad in Nocturne
- Prismacolor colored pencils
Steps: Note: I inked all my edges in Vintage Photo
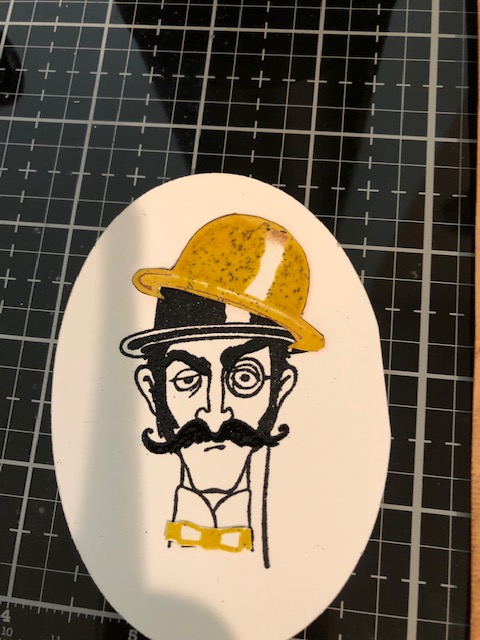
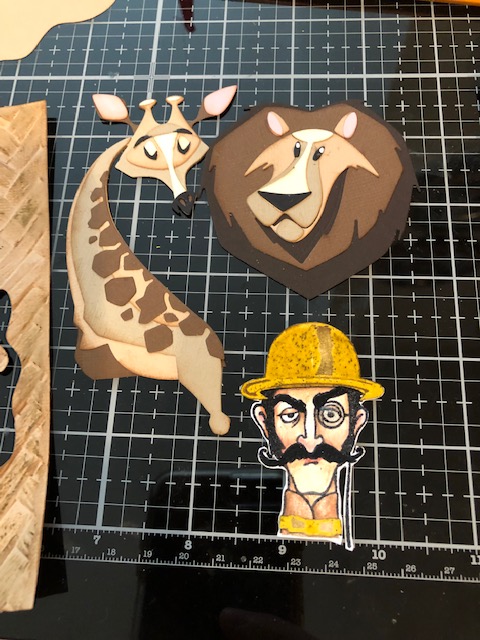
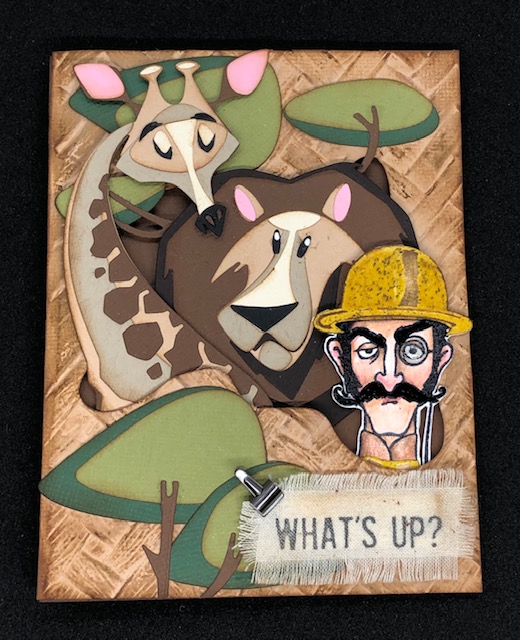
- Stamp the man with the bowler hat from Inquisitive in black, then emboss with black powder, then stamp him again in Fossilized Amber Oxide and emboss with Fossilized Amber distress glaze. Fussy cut the amber hat and tie and glue them onto the black stamped piece. Color him a bit. I used Prismacolor pencils. Note that apparently I had some black powder still in my tray when I did the glaze, so my hat came out a little speckled. I kind of liked it so I left it, but keep that in mind if you don’t like the speckles. Finish him by glazing his monocle with dimensional glaze if desired. Let dry , then fussy cut him out.
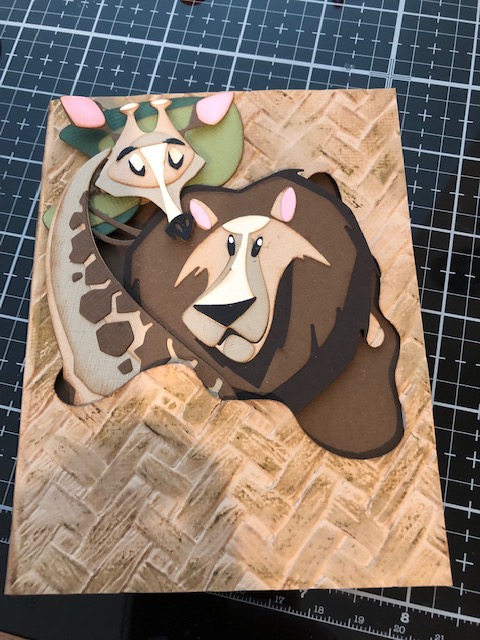
2. Assemble Harrison and Gertrude. Note, you are only going to see the top of them so there is no need to do a complete body as it won’t fit on the card anyway.
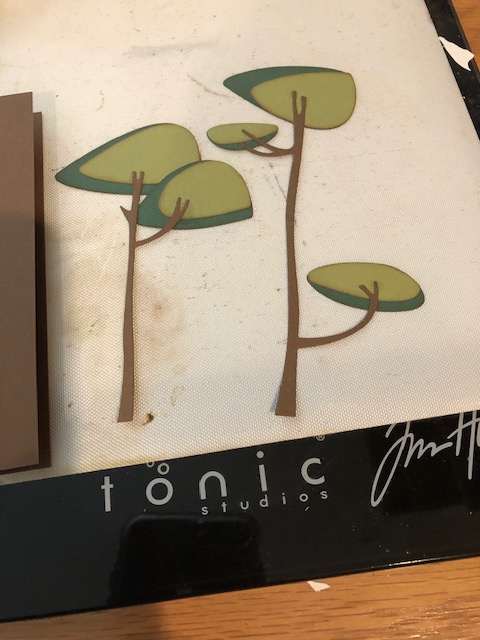
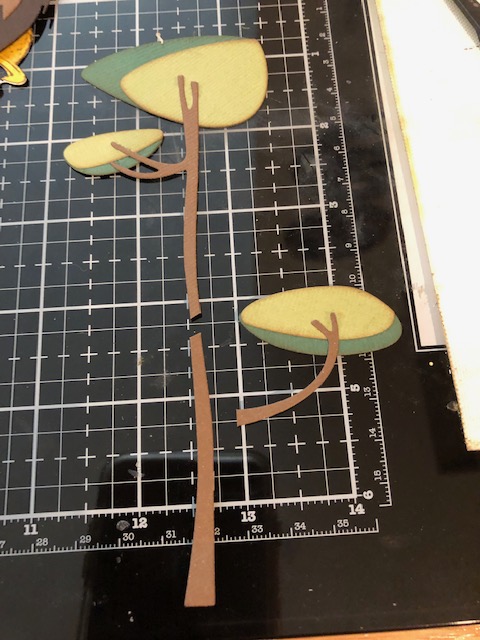
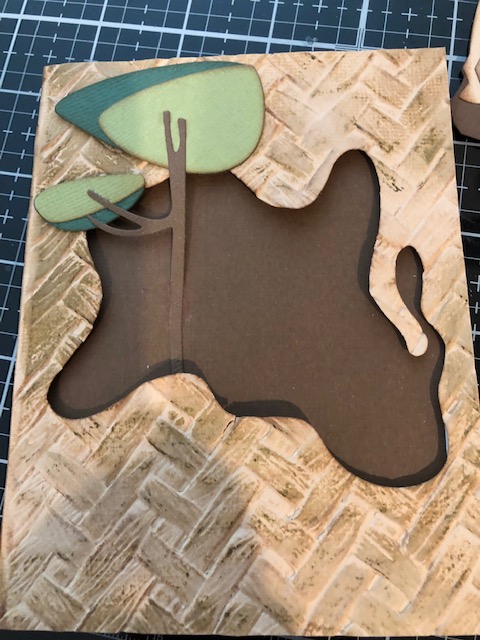
3. Assemble some funky trees. Again they won’t fit as is on the card so I trimmed the tall one as shown and trimmed the shorter one after I had attached it to the card.
4. I created the background using a piece of beige card stock that I die cut using the largest die from the Splat set. It gives a nice wavy hole for my characters to pop out of. I embossed this piece with the Intertwine embossing folder, then went over it to highlight the pattern using Vintage Photo ink.
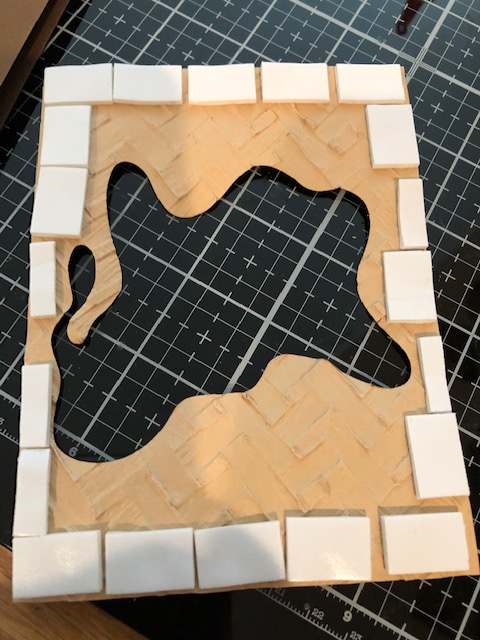
5. Assembly. I put foam tape just around the edges of the beige piece and attached it to a card base cut out of dark brown card stock. Keep the center clear so you can position your characters more easily.
6. Attach the top of the tallest tree first, then pop up Gertrude on top of this tree. Next tuck Harrison under Gertrude but on top of the tree trunk using foam dots and glue. Then pop up the man into the lower right corner of the curve. Tuck the tree branch you trimmed from the tall tree onto the top right of the card, hiding the end under Harrison. Finally attach the smaller tree to the lower right of the card and trim the trunks to fit the card.
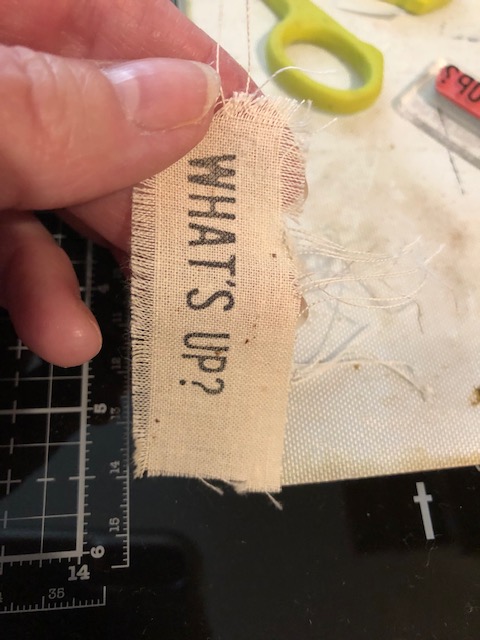
7. Stamp “Whats up?” onto a scrap piece of muslin using Versafine ink. Fray the edges by pulling threads evenly around the piece. Attach it to the lower right with foam dots and finish with a tiny clip attached and glued to the upper left of the muslin.

8. Go over all your edges etc with Vintage Photo ink and your card is finished!
Hope you enjoy this card and make one to send to someone maybe you haven’t been able to see in awhile. Have a great week! -Lisa

Love it! Wish I were going on a safari so you could send it to me LOL!
LikeLike