
When I saw this die, I immediately thought the carrots would be cute musical instruments. I guess my brain just works in weird ways…lol. Anyway, I thought it would be a fun project. I took lots of pics this time, because even though it’s not hard, it might be hard to explain without pictures.
Materials:
Sizzix Carrot Bunny 665213
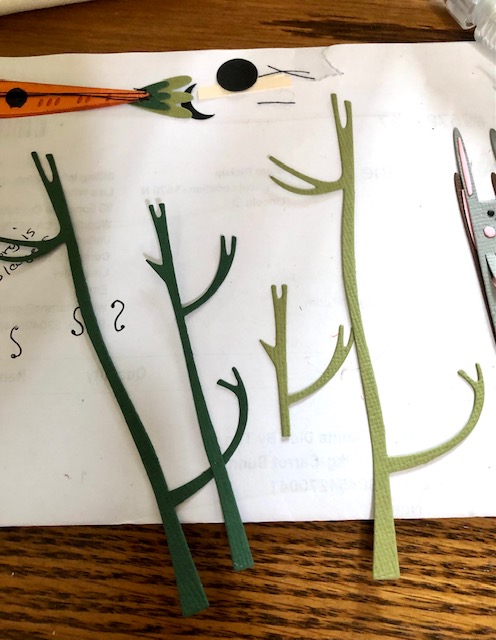
Sizzix Funky Trees 665217
Stampers Anonymous Music and Advert Stamp CMS358
Ranger Peeled Paint Distress Oxide
Ranger Vintage Photo Distressed Ink
Tim Holtz Idea-ology Ticket Book TH94036
Black thread
Small piece of natural color twine
Tim Holtz Idea-ology typed tokens TH93203
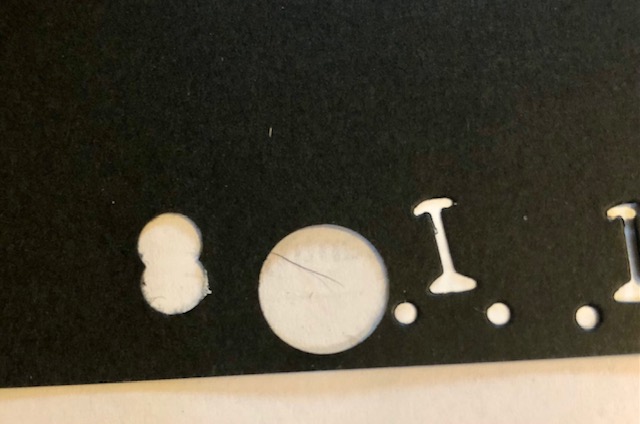
Hole punches 1/4″, 3/4″ , 1″
Steps: note- all cut edges are inked in Vintage Photo distress ink
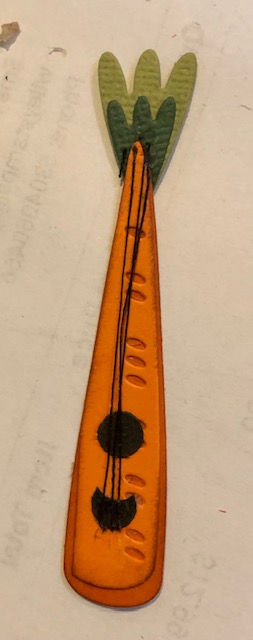
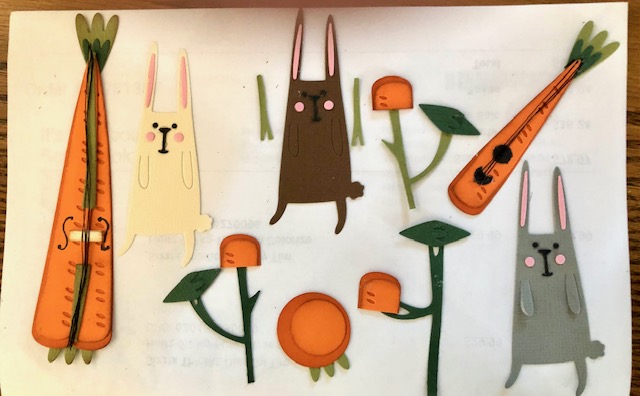
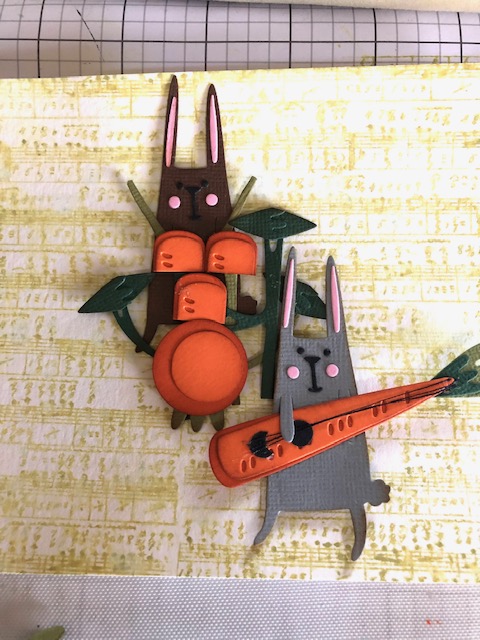
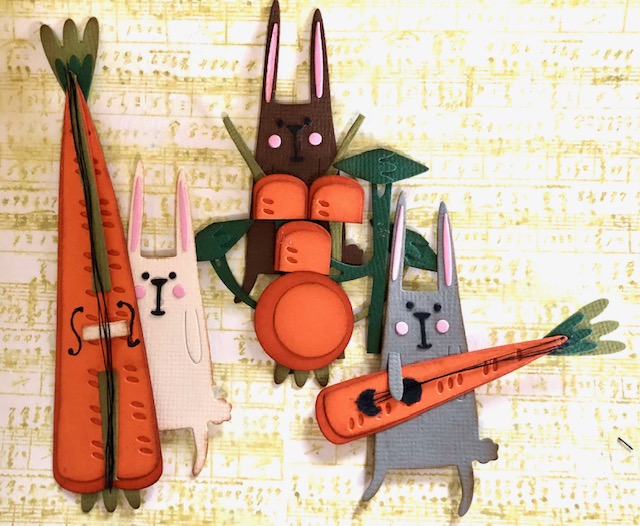
- Make the instruments. a. For the guitar I used the smaller carrot die in two colors of orange card stock, with two colors of green for the leaves. I attached the greenery to the pointy end of the carrot. For the hole, I punched a complete hole, then punched again within the first hole to get a hole with an arc punched out. I glued those on, then glued on three pieces of black thread for the “strings”
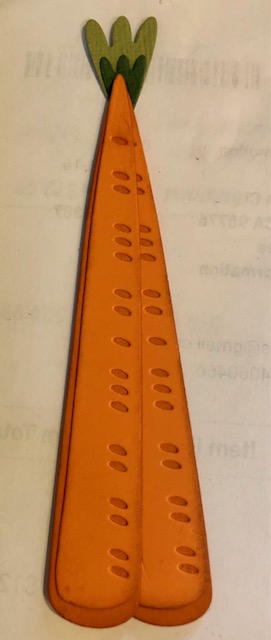
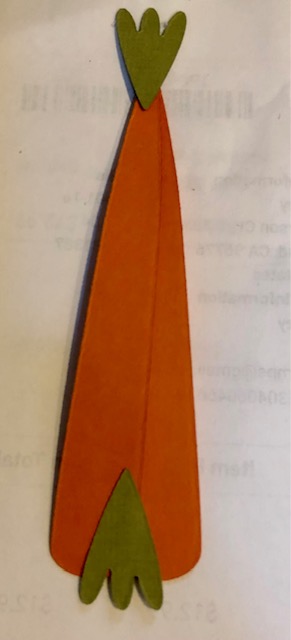
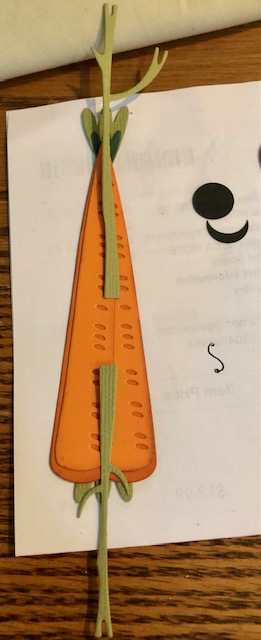
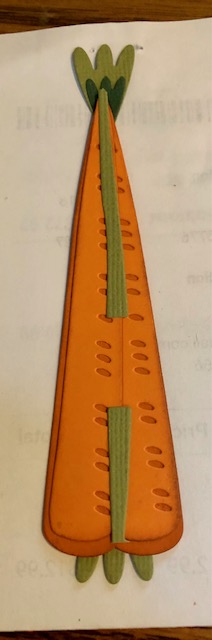
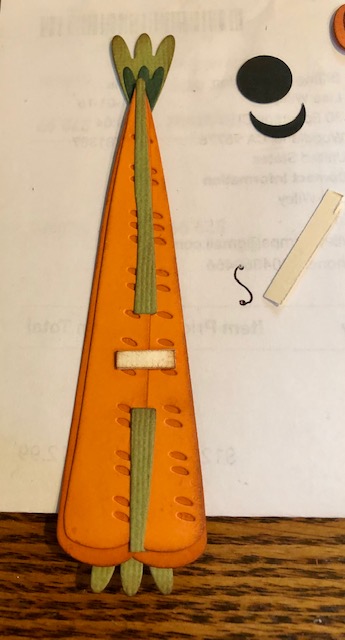
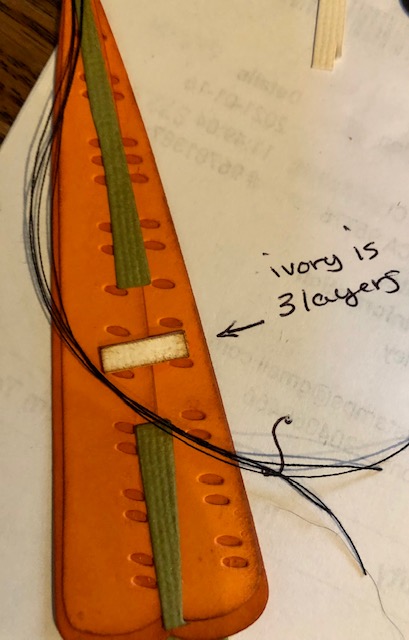
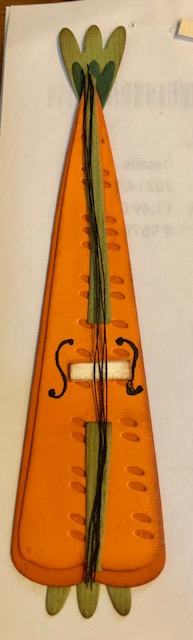
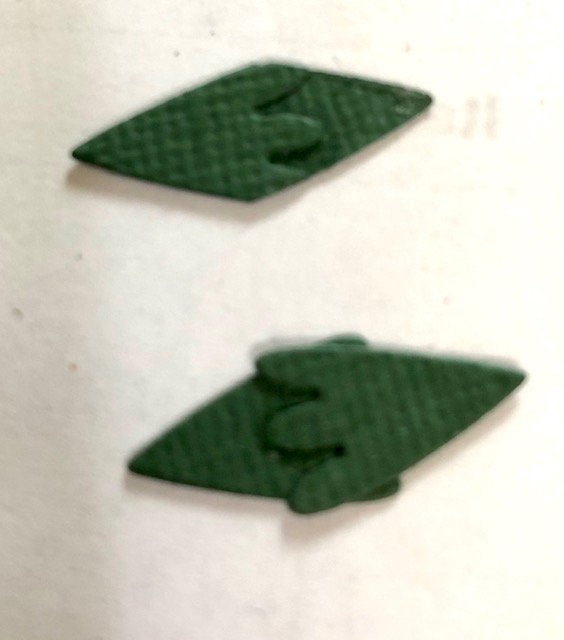
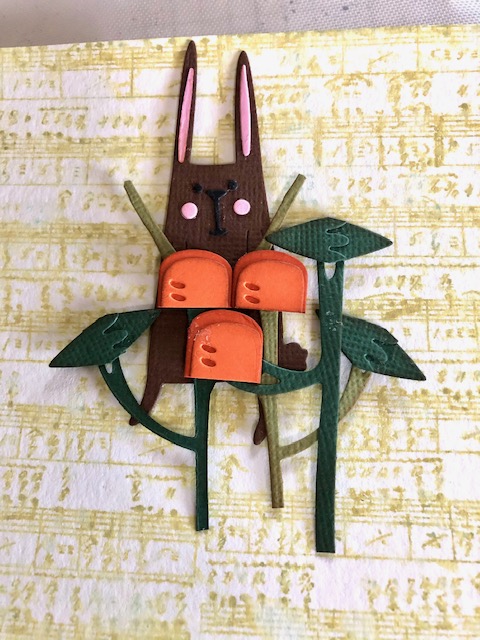
b. For the large bass, I used the larger carrot die, cutting out two complete carrots, the greenery and an extra of the larger leaf for the stand. I also used the trunk pieces shown from the funky trees set . (I don’t know the technical names of the parts of the instruments as you probably can tell- I just used a photo from Google for reference lol) Glue the two carrots side by side, slightly overlapping with the pointy ends aligned. Glue the complete leaf to the pointy end of the combined carrot and the extra piece to the bottom for a stand. Glue the two trunk pieces to the front as shown and trim off the excess. Stack three small rectangles of ivory card stock and glue in between the trunk pieces. I free hand drew the two “S” markings. Glue 4 pieces of black thread to the front for the strings.

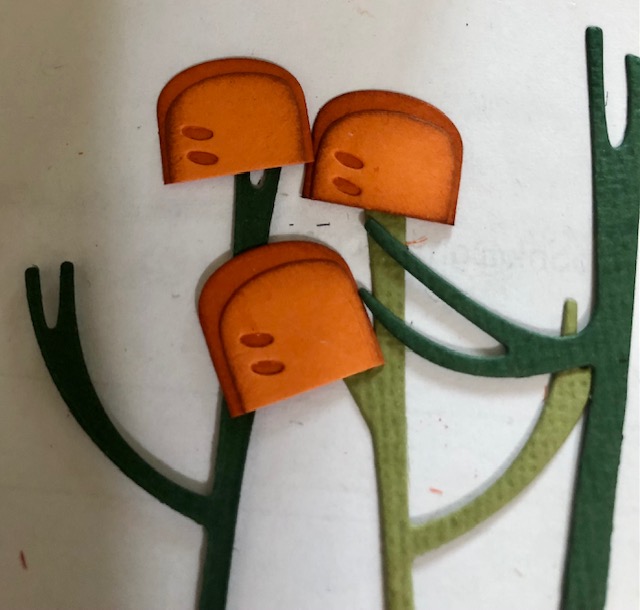
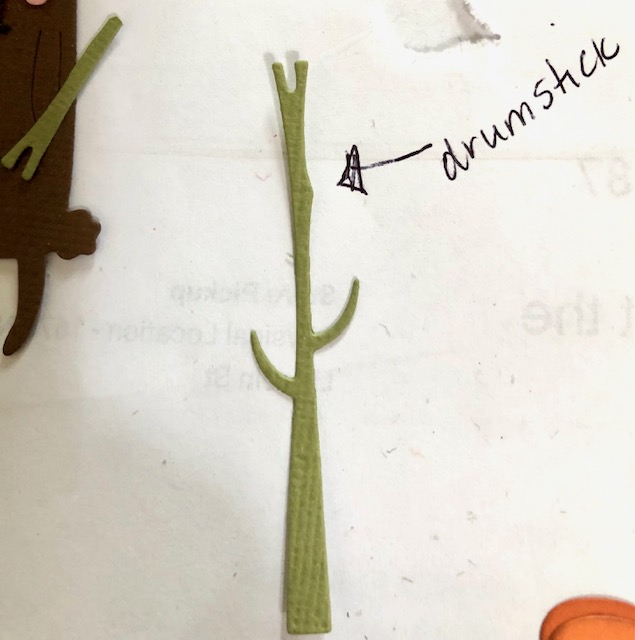
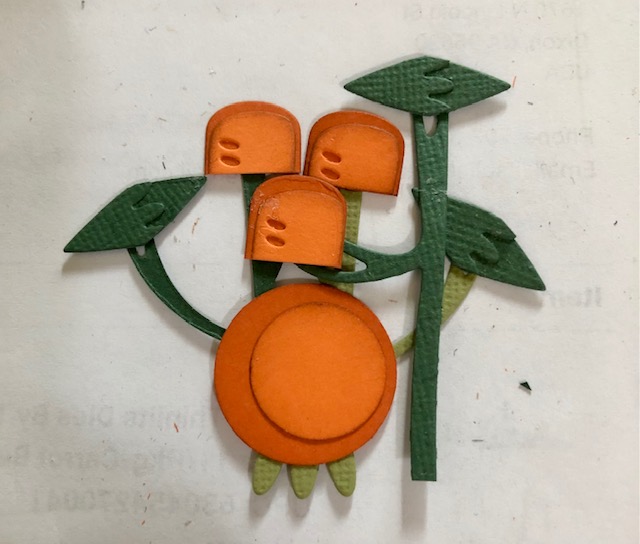
c. The drums. I used pieces of trunks from the funky trees set for stands. I cut the tops off of three completed carrots, leaving one slightly larger than the other two for the drums. For the cymbals, I used two of the smallest leaf dies for each cymbal. I glued each set of two, overlapping the wide ends, then trimming off the excess. For the large drum, I used a 1″ circle and a 3/4′ circle glued to the top of it. I made an stand for this piece using another large leaf. The drumsticks are trimmed from another trunk piece.
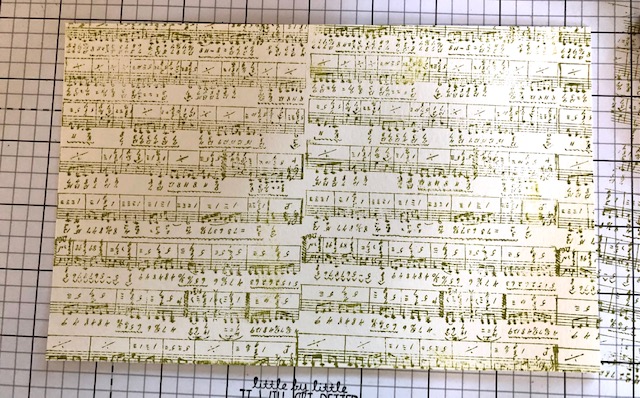
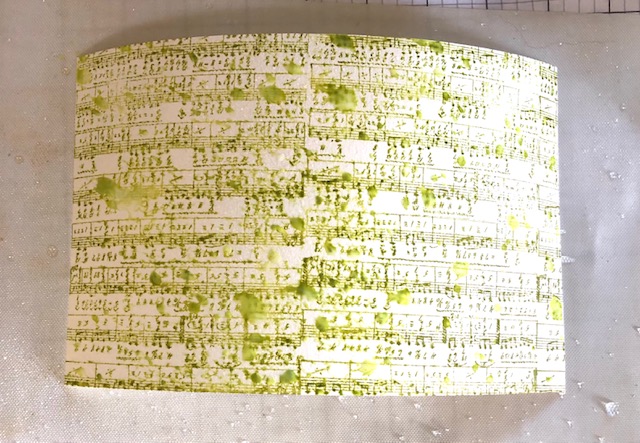
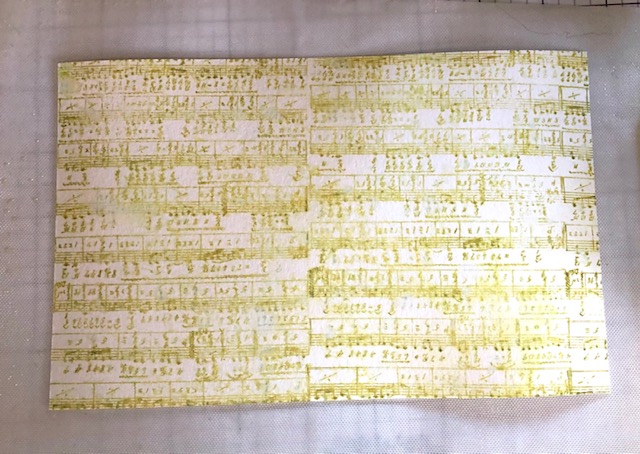
2. To make the background, I stamped the music sheet from the Music and Advert stamp set on watercolor card stock several times to fill the paper, using Peeled Paint oxide. I then spritzed and blotted the paper several times. I started with a sheet approximately 5 1/2 ” x 7″. This will get torn on the edges so measurements end up being approximate, but I’ll provide the finished measurements at the end.
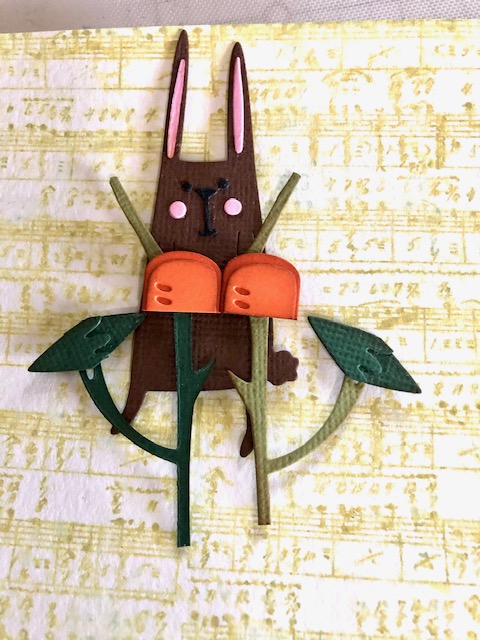
3. I cut out three different colored bunnies, one brown, one grey and one ivory. I laid out all my pieces to keep myself organized and started assembling my layers.
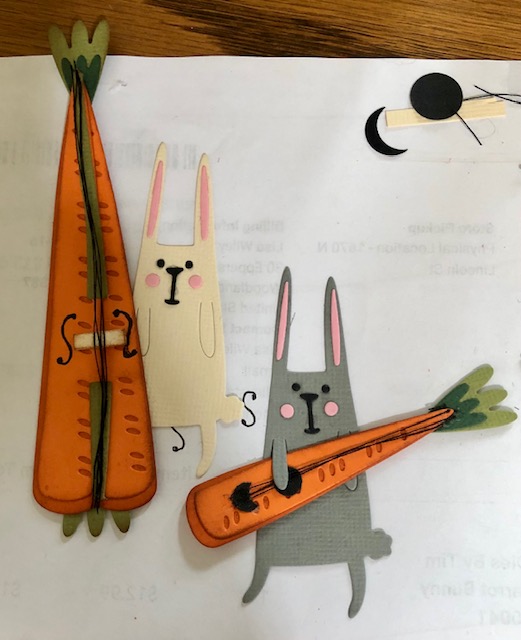
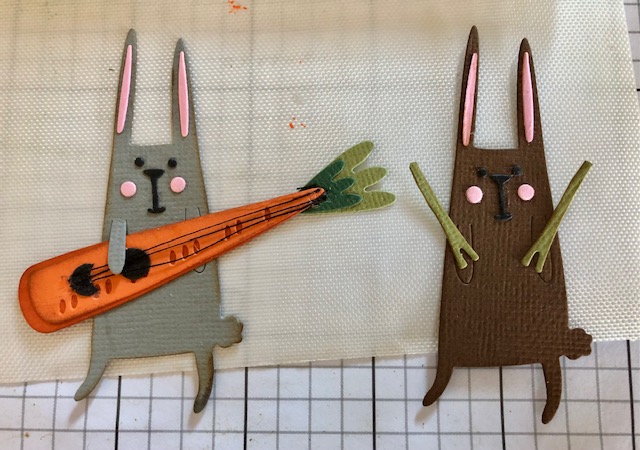
4. I glued the guitar to one bunny, glued the bass to another and glued drumsticks to another. The drums all get glued on in pieces when you are ready to assemble everything.
5. Start layering with the drummer bunny. I’ve taken pictures of each step of the assembly here for ease. The bunny is popped up with foam tape with each subsequent layer also popped up.


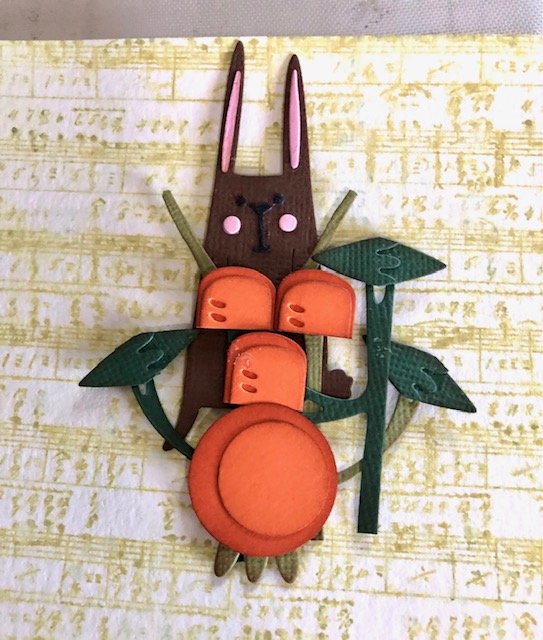
6. Add your other bunny musicians with foam tape.
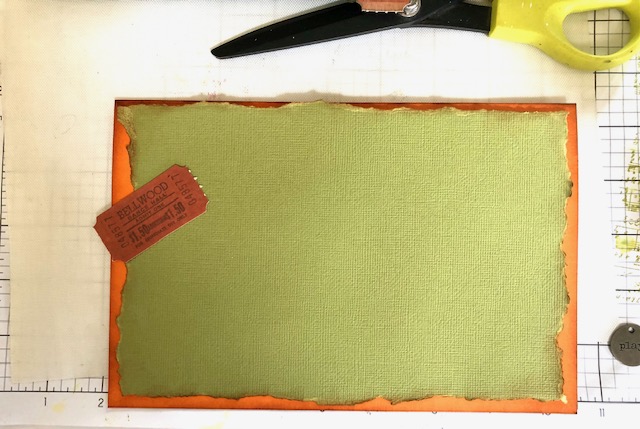
6. Tear the edges of each layer if desired and distress the edges. This card has a base orange layer, a light green layer, a dark green layer and the image layer all torn and distressed. Tuck tickets and ticket pieces between the layers as shown and assemble the layers.

7. I printed out a music quote I found online onto some white card stock. I then cut apart the quote, distressed the edges and added it to my bunny layer. I added more ticket pieces to the back of the bunny layer before attaching it to my card base.
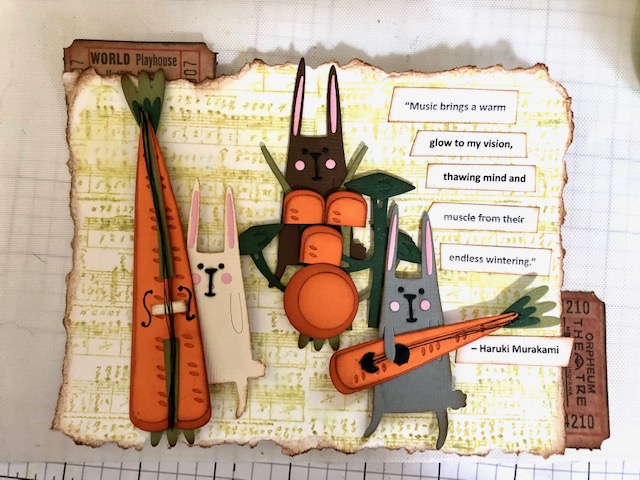
8. Finally I added a small twine bow to a typed token and attached it to the left of my bass player.
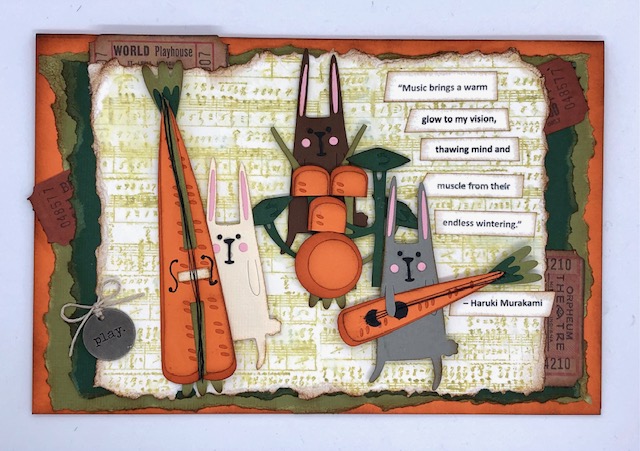
The finished measurement of the layers are as follows. Note they are approximate as I ripped all the layers. This should fit inside a half fold size envelope.
Orange base- 8 3/8″ x 5 1/2″
Pale green layer- 8″ x 5 1/4″
dark green layer- 7 1/2″ x 5″
Bunny layer- 6 1/2″ x 5″
I hope you like this card. I sure had fun making it. I can see these bunnies in a few other projects, especially with Easter coming up. Have a fantastic week! – Lisa

very creative
LikeLike
Absolutely the cutest card. SO CREATIVE!!! Thank you for posting all your pictures – that was so nice of you to provide the inspiration for all!
LikeLike
This is so cute and creative! Love your imagination!! Thanks for sharing.
LikeLike
I wish I had a wierd brain like yours! 😀 I mean, I do have a wierd brain, but… 😀 The way you altered and used the dies to make this adorable bunny band is so creative, perfect, and not least hilarious, I LOVE it! 😍👏😀
LikeLike