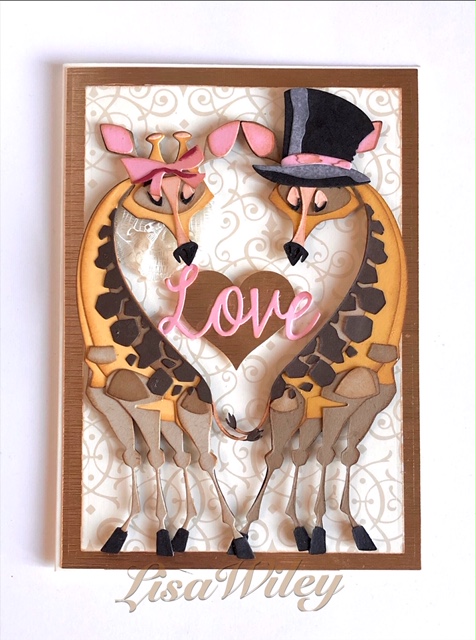
Hello everyone! This week’s card showcases Gertrude once again. This time it looks like she is getting married! A simple flip of the pieces and Geoffrey/George(?) was born. For the steps I’m just going to call him George. Enjoy!
Materials used:
Sizzix Tim Holtz dies: Gertrude (664429) and Winter Wardrobe (664754)
Distress Ink- Vintage Photo
Stampin Up! heart punch
Spellbinders die – SCD-026 (Love)
Tonic Studios craft perfect speciality paper- Golden Satin
Steps:
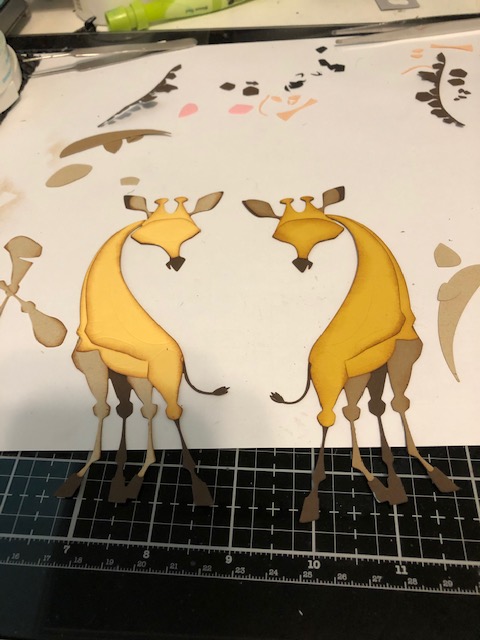
- Assemble Gertrude and George. I die cut all the pieces at the same time, keeping separate piles for Gertrude and George. For George I flipped over the pieces. I distressed all edges with Vintage Photo. I assembled the two side by side so I could mirror the score lines from the original orientation on the flipped over pieces, since they do not show up well on the backside of the pieces.
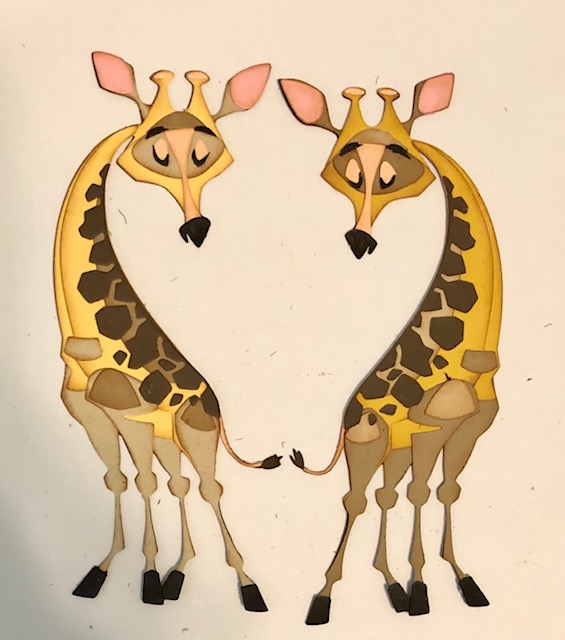
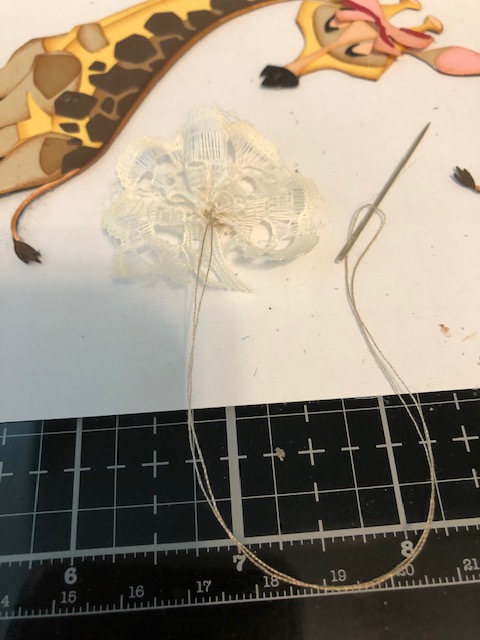
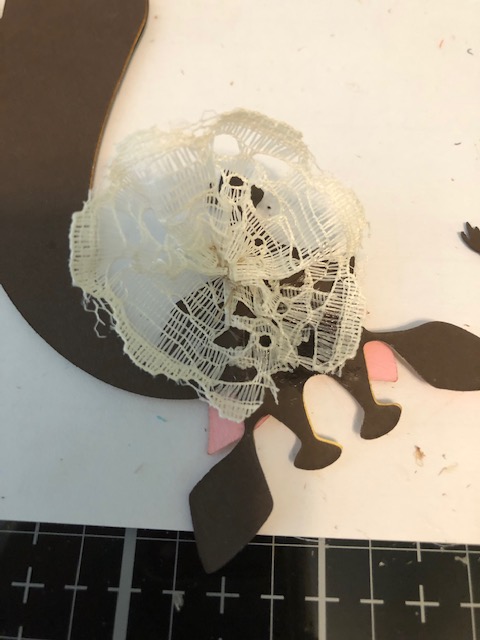
2. From Winter wardrobe I die cut the top hat and the ribbon. You will need to trim the tails of the ribbon if you don’t want it covering Gertrude’s eyes. I glued those pieces to the happy couple. For Gertrude’s veil, I hand gathered a small piece of lace trim with needle and thread and glued it to the back of her head.
3. Make a 5″ x 7″ card base (10″ x 7″ piece of card stock, scored to make a portrait orientation base). Cut a mat of the gold satin card stock – Mine is 6 7/8″ x 4 7/8″. Here is a tip if you like to conserve your fancier papers: Die cut out the center of the mat to save for later. Just make sure you leave enough of an edge that the next layer will cover it.
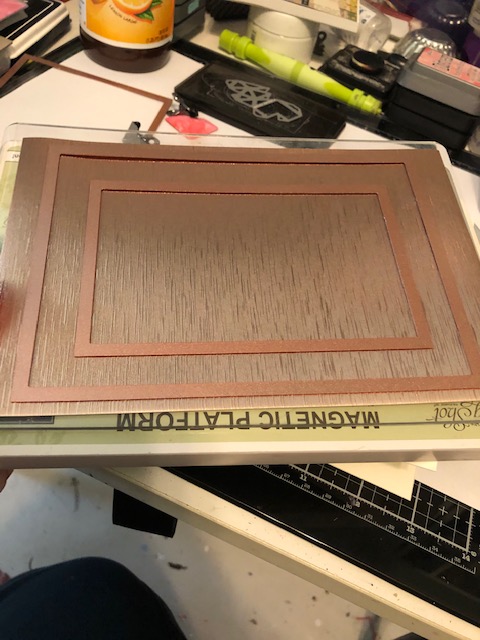
The final mat is from some older paper I had, that looked wedding-ish to me. It measures 6 3/8″ x 4 3/8″.
4. Adhere all of the mats to your card base, then pop up Gertrude and George, with touching ears and tangled tails. Punch a heart from the gold satin paper (you can use the piece you cut from the center of the mat!). Pop up the heart, then adhere the love sentiment on top.
That’s it! An easier one this week, with most of the time spent assembling the giraffes. Remember to be patient, have tweezers, a pick up tool and clear drying glue handy and have fun (I like the Dries Clear glue by Art Glitter. It has a nice fine tip and it doesn’t dry shiny like some clear glues) . The colorize dies are marked on the back with colors and numbers to sort them easier. Also remember that Sizzix has assembly direction videos for their colorize dies which are very helpful. Have a great week! – Lisa

This is absolutely amazing!
LikeLike