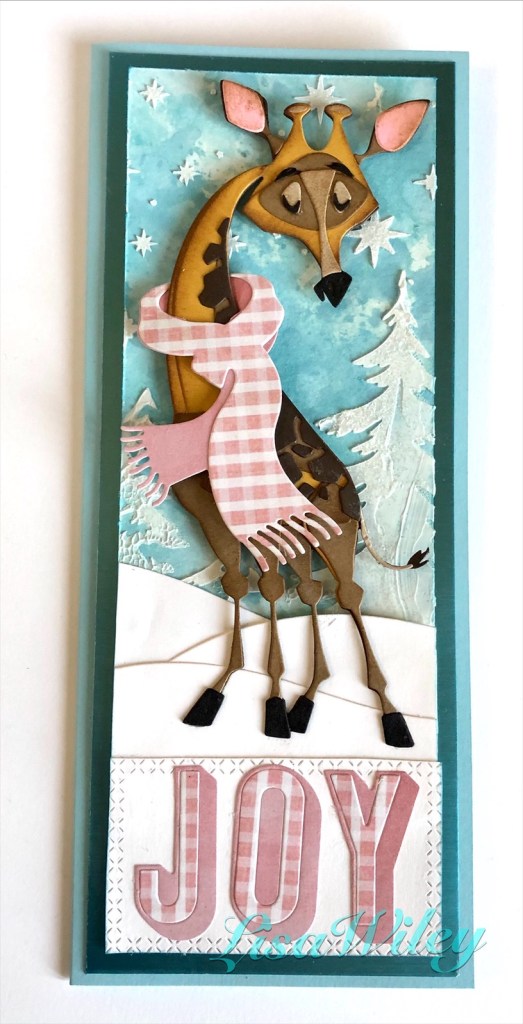
This week’s blog features Tim Holtz colorize dies with Gertrude stealing the spotlight. Slimline cards seem to be all the rage, and Gertrude fits perfectly on a standard 8 1/2″ x 3 1/2″ slimline base.
Materials List:
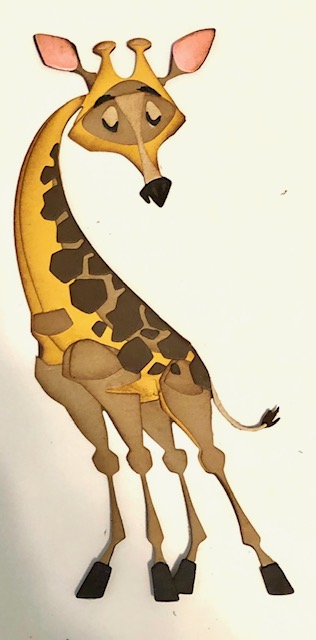
- Tim Holtz thinlets- Gertrude (664429), Winter Wardrobe (664754), Alphanumeric Shadow Upper (664729)
- Ranger Distress Oxides- Tumbled Glass, Broken China, Speckled Egg
- Tim Holtz Stencil- Woodland (THS071)
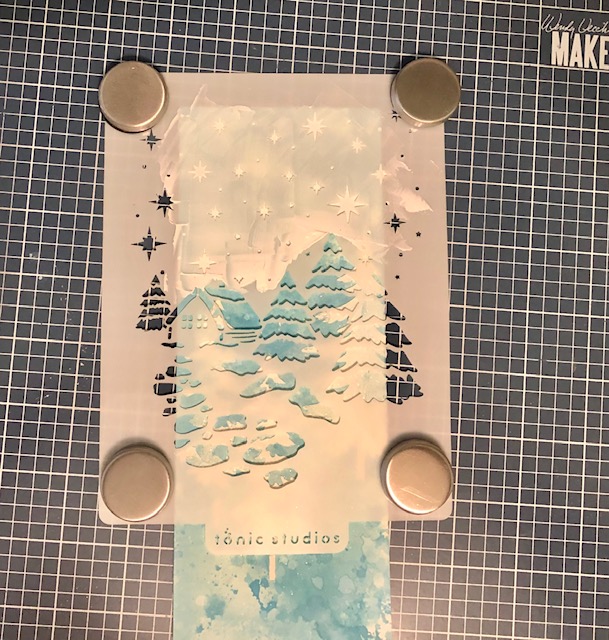
- Tonic Studios stencil – Winter Wonderland
- Tonic Studios Mirror paper in Silky Sky
- Tim Holtz Rock Candy Glitter and glitter duster
Steps:
- LaLa Land crafts paper- Christmas Hodgepodge (DP004)
- Fun Stampers Journey Modeling Paste
- Rubbernecker stamps Nested Rectangle Die Cross Stitch (5144-03D)
- Various colors of card stock in yellows, browns and pale blue for base
- Watercolor card stock for main panel
- Make a slimline card base out of pale blue card stock, measuring 8 1/2″ x 3 1/2″. Cut a mat layer from mirror cardstock, measuring 8 1/4″ x 3 1/4″. Cut the main base layer from watercolor card stock, measuring 7 7/8″ x 2 7/8″
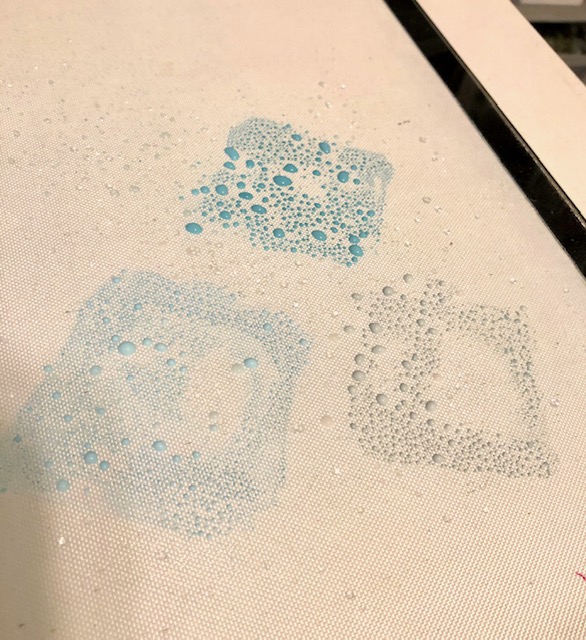
- Ink up the watercolor base paper by rubbing the three blue oxide colors on a mat and spritzing with water. Dab your card stock into the inks, drying between layers until you get a background that pleases you.
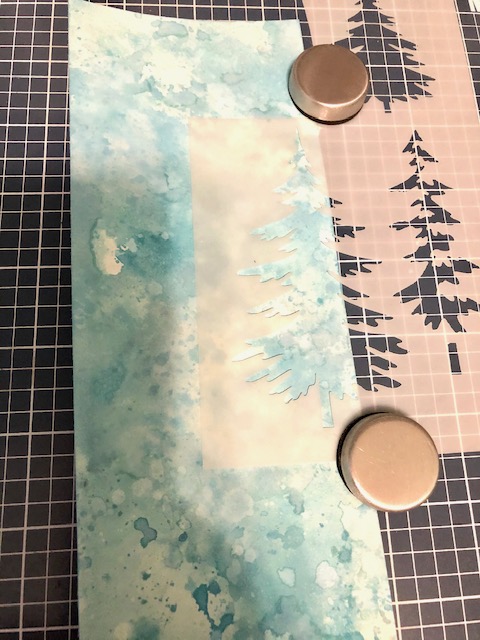
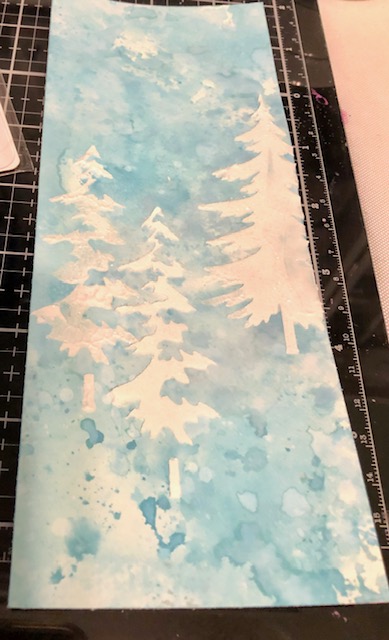
3. Once dry, use the Woodland stencil and rub modeling paste over the trees with a palette knife. Carefully lift off the stencil and dust glitter over the wet paste with the glitter duster. Once your trees are dry, use the Tonic stencil to add only the stars to the top of the panel. Dust these with glitter as well. Make sure you clean your stencils right away so the paste does not dry on them.
4. Assemble Gertrude, the scarf from Winter Wardrobe and the Joy letters. Sizzix.com has wonderful videos that explain the assembly process for their Colorize dies so I won’t go into detail here. You will need to snip part of the scarf in order to slip it around Gertrude’s neck. I attached a small piece of card stock to the back of the scarf once I had it around her neck, just for extra stability. I also popped a foam dot under the center section of the scarf to keep it attached to her body.
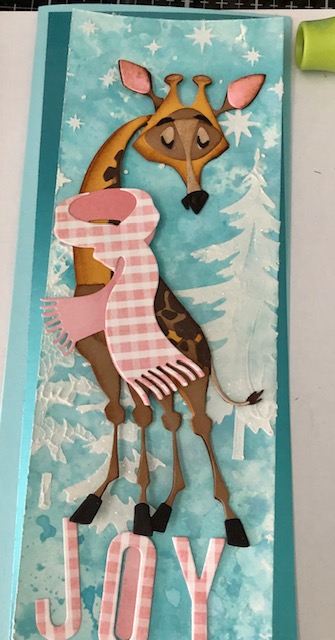
5. Die cut a small cross stitched rectangle (approx. 3″ x 1 3/4″) from white card stock and mount your letters to it. Cut three sections of scrap white card stock with wavy borders and attach them approximately 1 1/2 ” from the bottom of the main image watercolor piece to look like mounds of snow.
6. Attach the white Joy piece to the bottom of the main image piece. You may want to trim the sides to sit almost flush with the edges. Attach Gertrude with foam squares to the upper portion of the piece.
7. Attach the mat, then the main watercolor piece to your base and you are finished!
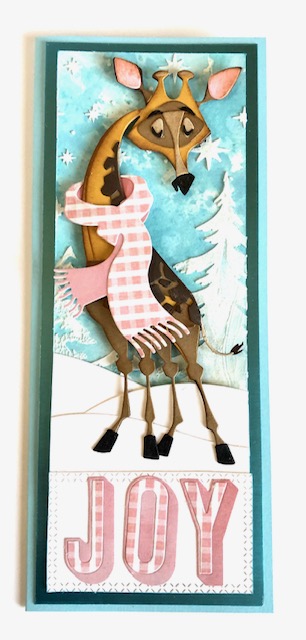
Hope you enjoy this card. Have a great week! – Lisa

Awesome card
LikeLike