Hi everyone and happy Friday! This card started because of a prize I won on Instagram from Tim Holtz. The Professor 2 was the stamp set I chose and I felt I had to use it. I also recently learned this fun new fold, so I thought I’d combine them. It was lots of fun to make. I hope you like it!
Materials List
Stamp Sets: The Professor 2 (CMS95), Good Thoughts (CMS085)
Mechanics Embossing Folder (662715)
Tim Holtz fabric tape
Tim Holtz quote chip
Tim Holtz tiny clips
Ranger alcohol inks- Pitch black, Mushroom, Gold mixative
Vintage Photo, Festive Berries and Black Soot Distress ink
Peeled Paint and Fossilized amber distress Oxides
Idea-ology ticket book
Small talk sticker
Black embossing powder
Black twine
Assorted gears (these were from a bag I got years ago- no idea of brand…lol)
Steel wool
No. 8 Distess tags
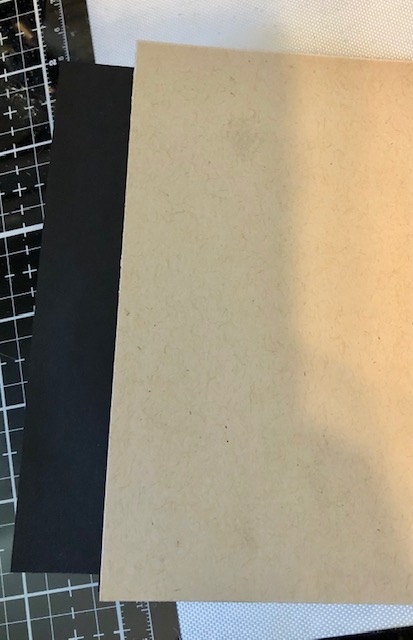
Cardstock in Oatmeal, black and ivory
Alcohol Ink Foil Tape
Steps: Note- I distressed all of my layers with either Vintage Photo or Black Soot distress ink.
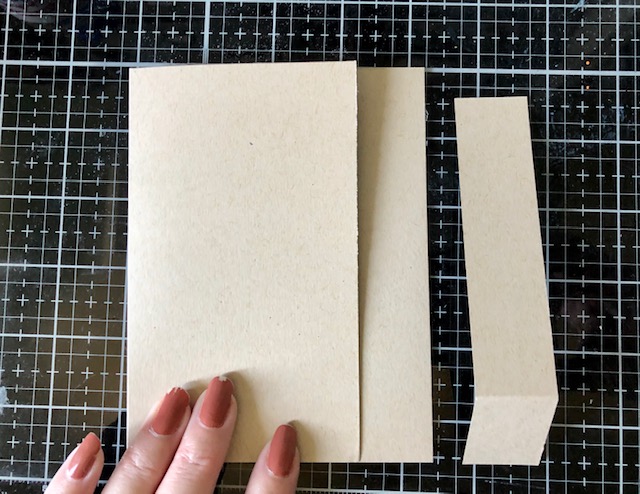
- Cut and score a standard card base from oatmeal or kraft cardstock (4 1/4″ x 5 1/2″)
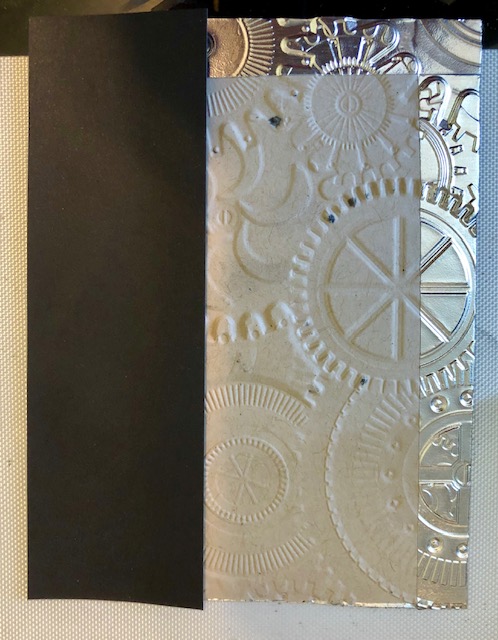
- Unfold this base and trim a 1″ x 5 1/2″ strip from the right side of the card front. Score this strip at 4 1/8″
3. From black card stock cut two pieces- one 4″ x 5 1/4″ and one 3 1/8″ x 5 1/4″
4. Glue the scored strip to the back of the 4″ x 5 1/4″ piece of black card stock on the tab only, centering the strip top and bottom. Glue this piece to the inside of the card base.
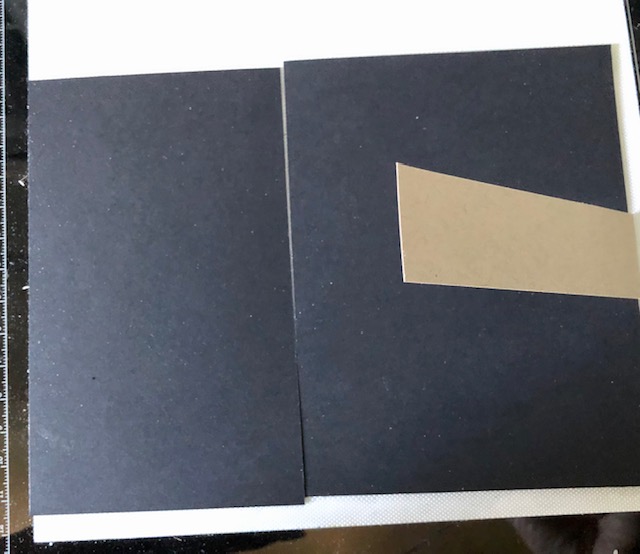
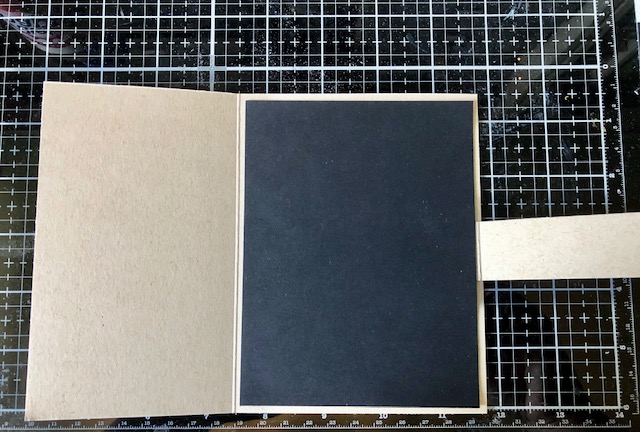
5. Glue the 3 1/8″ x 5 1/4″ piece of black card stock to the front of the card, centering it top to bottom and lining it up to the right edge of the card front.
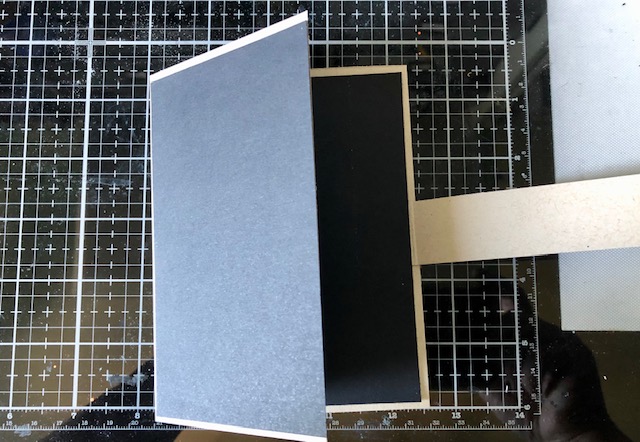
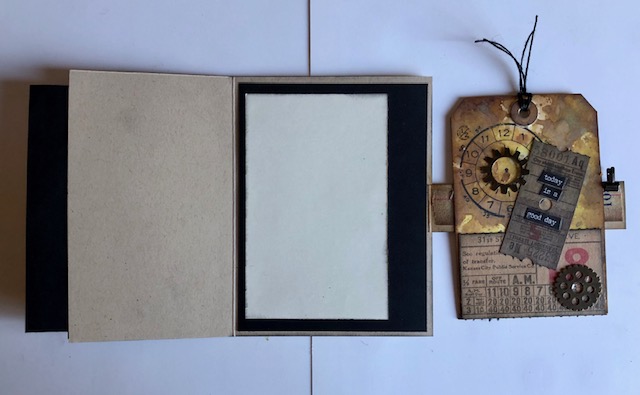
Your finished base should look like this when closed. Set your base aside for now.
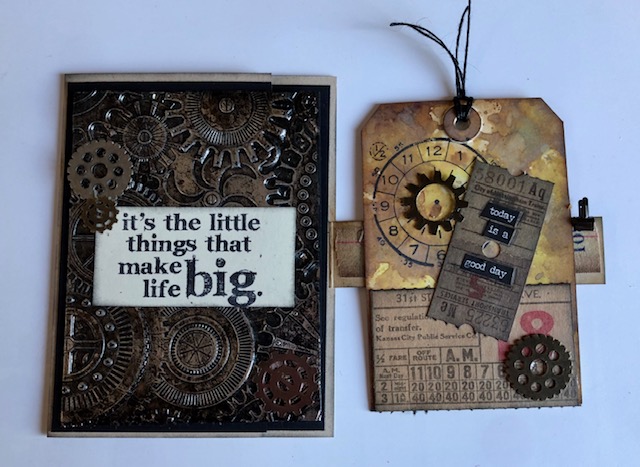
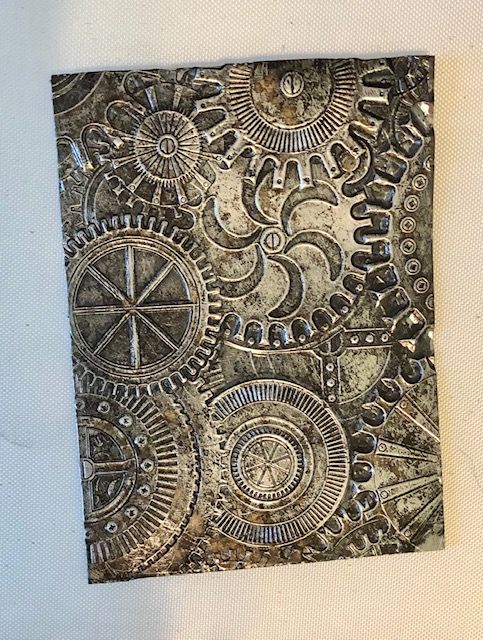
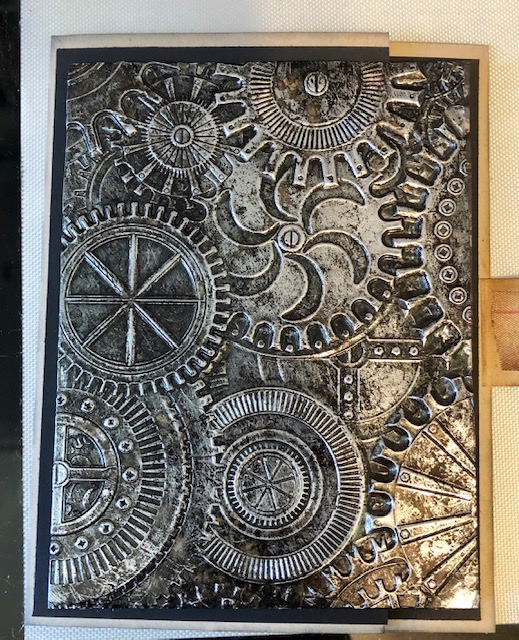
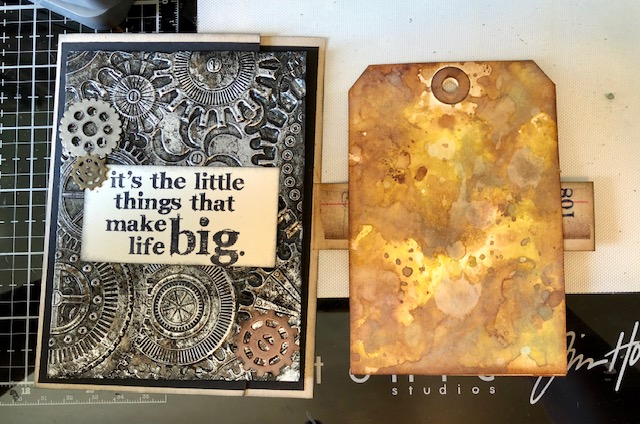
6. Cut a piece of scrap cardstock 3 3/4″ x 5″ and apply Alcohol Ink Foil Tape, covering the entire piece. I used a bone folder to smooth it out. Emboss this piece with the Mechanics 3 D folder.

7. Drip Pitch Black and Mushroom alcohol inks directly on the embossed paper and smooth it around with a felt applicator. Let dry. Apply pitch black, mushroom and gold mixative to a felt applicator and pounce this ink onto the embossed image. ( Tim Holtz did a detailed demonstration of this technique. You can watch it on his blog under Q & A alcohol inks : part 2). Once dry, rub over the embossed piece with a bit of steel wool attached to an applicator.

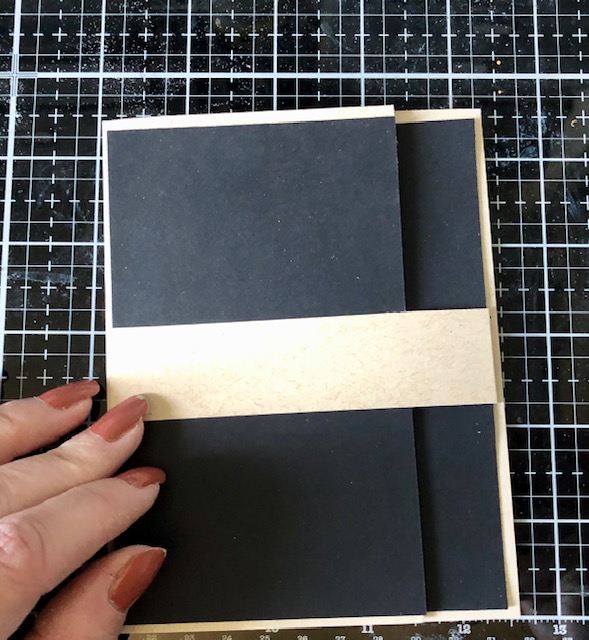
8. Cut a piece of black card stock 1 1/2″ x 5″ and glue under the right side of the embossed image. This piece will hang over, so the black is just to make it look tidy when the recipient opens the card.
9. Glue the embossed piece to front of card, centering. Make sure you don’t put adhesive on the right edge!
10. Apply strips of fabric tape to both sides of the band and set base aside.

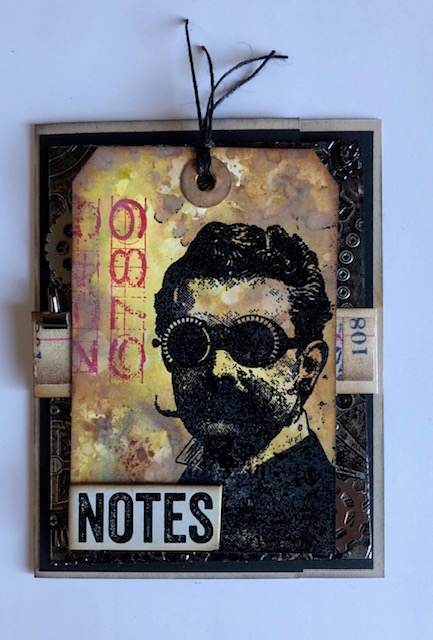
11. Cut 1 1/2″ from the bottom of two distress tags. Distress both tags with Vintage Photo distress ink and Peeled Paint and Fossilized Amber distress Oxides. Let dry.

12. On one of the tags stamp The Professor in black archival ink and emboss him with black embossing powder. Stamp the numbers from the same set in Festive berries Distress Ink.
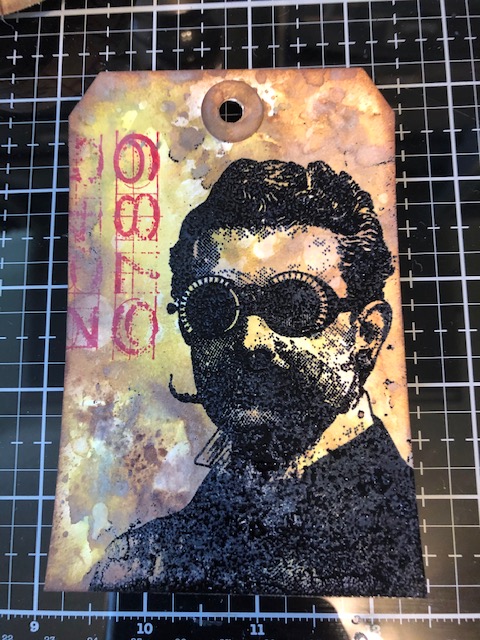
13. Applying adhesive only to the band, attach the professor tag to the front of the card, centering it on the front. Add a quote chip to the lower left corner.
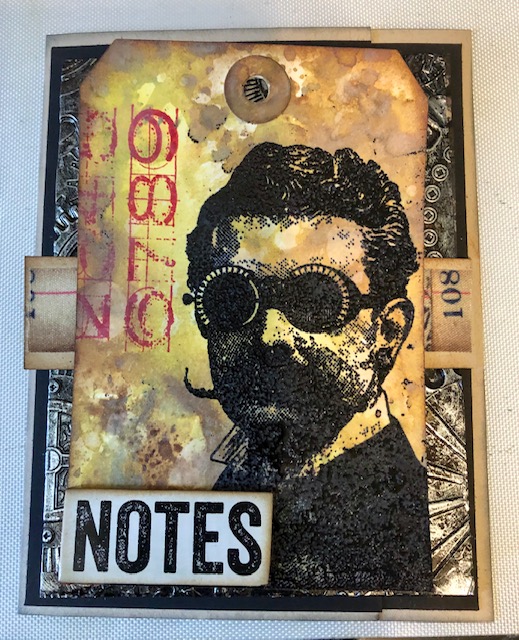
14. On the remaining tag, stamp the circle image with black archival. Decorate with tickets, gears and a saying from small talk. Outline the saying with pencil to make it stand out ( a trick I learned from Richele Christensen). Adhere this tag to the back of the front tag. Thread two pieces of black twine through the tags. Add a tiny clip to the end of the band.

15. Using one of the 1 1/2″ pieces you cut from the distress tags, Stamp “It’s the Little things…” from the Good Thoughts stamp set in black archival ink. Attach this to the embossed paper, trimming the sides if necessary so that it is hidden when the card is closed. Add some gears that will peek through the front when closed.
16. Don’t forget to add a piece of ivory card stock ( 3″ x 4 3/4″) on the inside to write your personalized message!
That’s it! Hope you like it! Have a wonderful weekend! -Lisa

Love it! I’m going to have to try this one. Nicely done, Lisa!
LikeLike
Very fun!! Love the embossed gears!
LikeLike