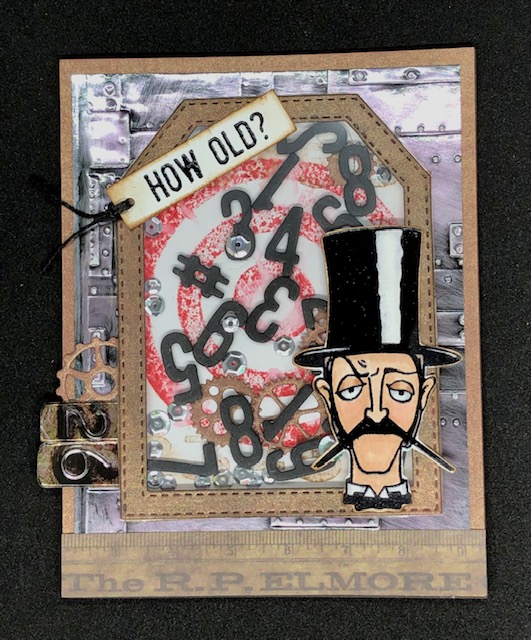
This week’s card was created for my son’s birthday. He turns 26 next week so I made it with him in mind. I’m loving the new Inquisitive set and thought it would make a fun shaker card! Enjoy =)
Materials:
- Stampers Anonymous/Tim Holtz Inquisitive CMS432
- Sizzix/TH 3D texture fades – Foundry 662717
- Alphabet/number Die- This is an old TH one I bought from HSN many years ago…it is not labeled, however. If anyone has the item number please message me =)
- Stamp Anniething Shaker Basics #2 die
- Sizzix/TH Gearhead die- 661184
- Idea-ology/TH type chips TH94031 (optional)
- Idea-ology/TH Ephemera Pack- Thrift shop TH93114
- Ranger/TH Alcohol inks- Pitch Black and Mushroom
- Ranger/ TH Distress Ink- Festive Berries, Vintage Photo
- Versafine Clair Ink- Nocturne
- Black embossing powder
- Black twine
- Black foam sheet (these are around $1 at Michaels)
- Ranger/TH Alcohol Ink surfaces- Foil
- Craft Perfect Pearlescent Card stock- Rusted Crimson
- Copics
- Small label die – this one is approximately 2″ x 3/4″
- Steel wool
- acetate sheet
- silver sequins
Steps
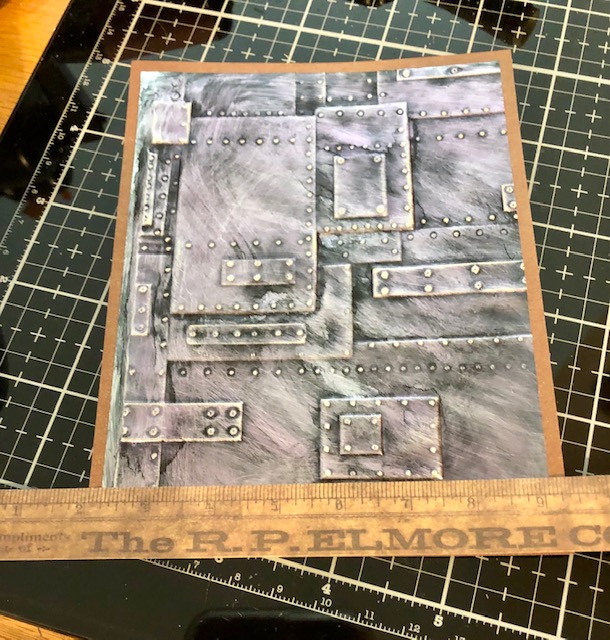
- Cut a standard card base measuring 4 1/4″ x 5 1/2″ when folded portrait style, and set aside. From the Craft perfect paper cut a piece measuring 4 1/4″ x 5 1/2″. From the foil alcohol ink paper cut a piece measuring 4″ x 5 1/4″. Run the foil paper through your die machine with the Foundry texture fades. Place a few drops of Pitch Black and Mushroom alcohol inks on a felt applicator along with some blending solution and rub over the entire surface of the embossed piece. Once dry, rub over the surface with steel wool to distress it. (I have a more detailed description of this process in the post titled The Professor if you’d like to take a look). Attach this piece to your card base.
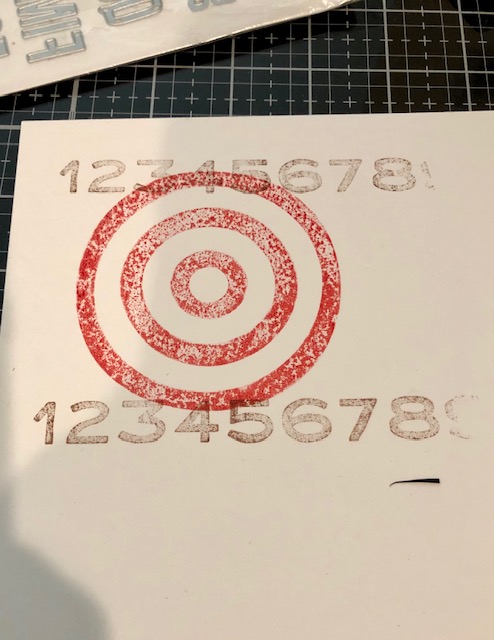
- Stamp the bullseye in Festive Berries on a piece of mixed media card stock, as well as a couple of sets of the numbers in Vintage Photo. I stamped off onto a piece of scrap paper before stamping and sprayed the paper lightly with water to make it more distressed looking.
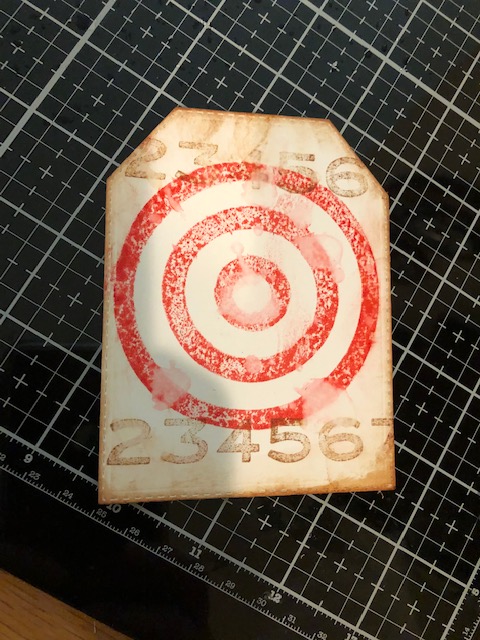
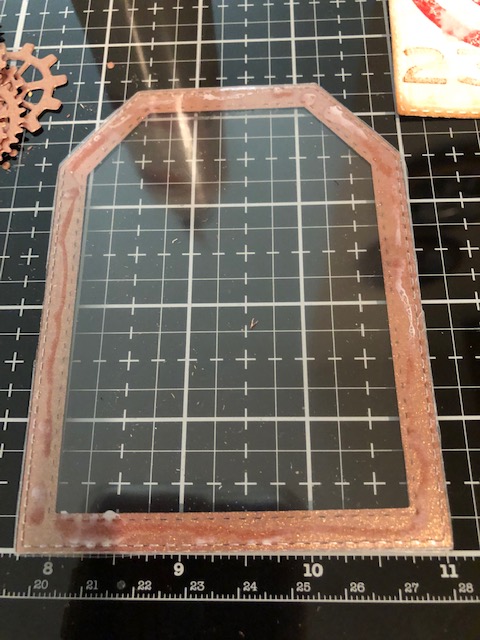
Cut this piece out using the tag shape in the Shaker Basics #2 set. Use this same die to cut a piece of acetate. In addition, cut out the frame piece from craft perfect card stock. Distress all the edges. I also rubbed pitch black alcohol ink lightly on the frame section.

3. Attach the acetate sheet to the back of the frame piece. Then, apply foam strips all along the edge of the frame. Leave the backing on for now. Set aside.

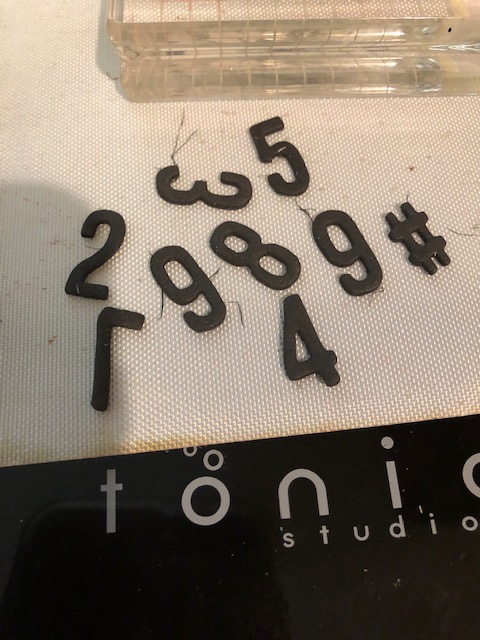
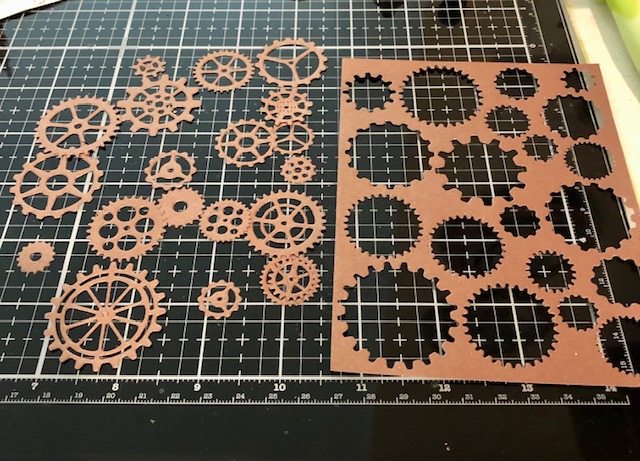
4. Cut out various numbers from the black fun foam. Use scraps of the craft perfect paper to cut out various gears. I just went ahead and cut a whole sheet of them even though I only ended up using a few. The rest will go in my stash for another project.
5. Place the numbers, a few gears and a few sequins in the center of the acetate/frame piece. When you are happy with the amount you have in there, remove the backing from the foam tape and attach the stamped tag piece. I only did one layer of foam as I didn’t want the numbers moving too much. If you want a more loose shaker, add another layer of foam tape before attaching your back piece.

6. Stamp the gentleman with the top hat on a piece of scrap white card stock with the Versafine ink then emboss with black embossing powder. If desired color him with Copics or whatever coloring medium you like. Fussy cut him out. Stamp “How Old?” on a scrap piece of card stock and cut out using scissors or a tag die.

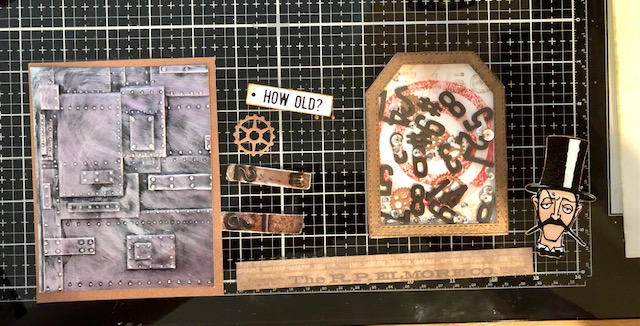
7. Putting it all together. Here is a picture of all the components you should have for the card. I used the ruler from the ephemera pack as well as the 2 and 6 from the type chips (choose the ones appropriate for your recipient )
8. Attach the ruler piece to the bottom of the card and trim the excess from the sides. Attach one of the extra gears and the type chips to the left side of the card in a location where the type chips will stick out from the shaker unit once it is added. Attach the shaker unit, covering the right side of the type chips. Attach the man to the bottom right side of the shaker. Thread some black twine through the sentiment tag and attach to the upper left side of the shaker.


Here is another picture of the finished card. I think my son will enjoy it very much. Hope your recipient does as well. Have a great week! -Lisa
