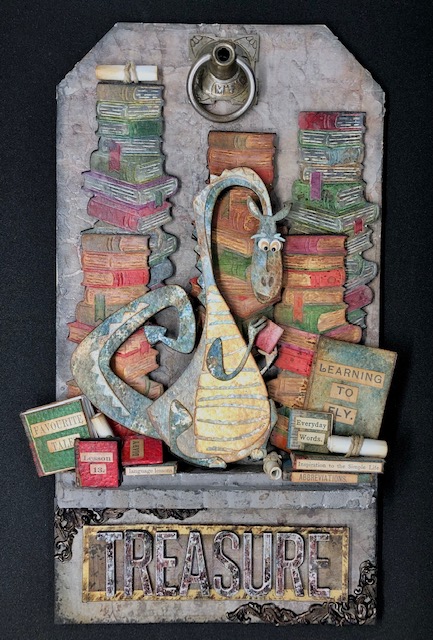
Originally I was going to talk about the “Treasure” portion of the tag, but quickly realized I needed to have directions for the actual background pieces first so I am switching Part 2 and Part 3. Part 2 will now have directions for the background piece and the ledge that Rupert and his books are sitting on. Supplies listed are for this step only.
Supplies Used:
Stampers Anonymous/Tim Holtz Medium thickboard tag- THETC-002
SA/Tim Holtz Layering Stencil- Decayed THS129
SA/TH ETCETERA thickboard trims- THETC008- Scallop Trims
Idea-ology/TH Paper Stash- Departed TH94054
Ranger/TH Grit Paste- Translucent- TDA71730
Ranger/TH Grit Paste- Opaque- TDA71792
Palette knife
grey acrylic paint
Distress Ink- Vintage Photo, Black Soot
Steps:
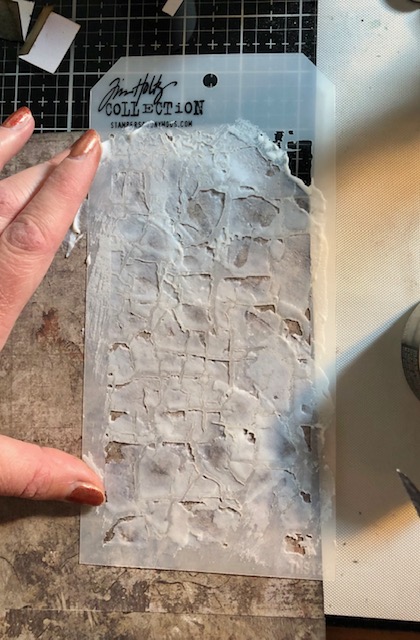
- Cover the thick board tag with two sheets from the Departed paper stash. I chose a design that looked like stone to me. Trim your excess. Be sure to safe the extra bits as we will use them in later steps. Distress the edges of the tag with Vintage Photo ink. Taking the Decayed stencil, apply translucent grit paste over the tag through the stencil using the palette knife. You will have to do this in two steps as the stencil is smaller than the tag. Allow the paste to dry between the two steps. Don’t worry too much about the seams as they will mostly be covered and they really don’t show once the paste is dry.

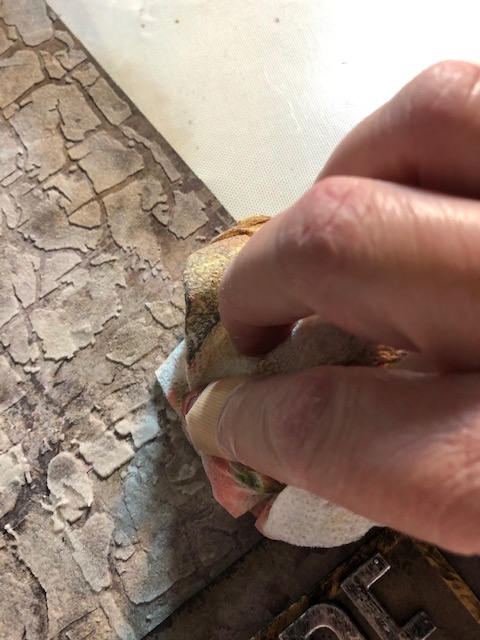
Once the paste is dry, you can add some watered down inks (vintage photo, black soot) to your background for some more depth. I just used my finger to apply inks, wiping off the excess as I went with a paper towel. Set aside to dry.


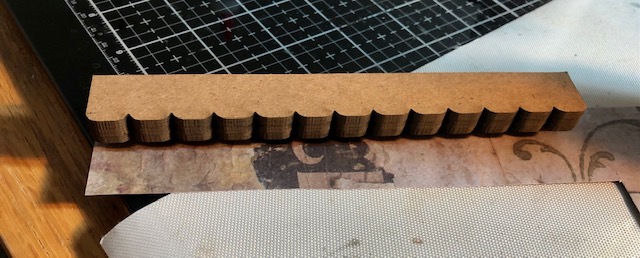
2. Make the ledge. The trims have several sets of three sizes included. I used the longest trims for this project. Note that each length has two different width pieces. I ended up using three of the wider pieces and two of the narrower pieces. Glue them together in a stack. Then, using the scraps you had left over from covering the tag, cover each of the ledges, trimming along the scallop edge (don’t bother cutting in the scallops, they will get filled in a bit)

Using a palette knife, coat the edges (the scallop side) with opaque grit paste. You can leave a suggestion of scallops as you like, but coat it well so it looks like stone. Leave the top and bottom surfaces flat so it is easier to stack books and add the treasure tag. (don’t panic if you get a little on the edges, just leave it mainly flat) You can also coat the sides in paste if you like). Once it is dry, paint all the portions that have paste, gray.

This piece will get glued on approximately 2 1/2″ from the bottom of the tag, but I recommend waiting until you finish the Treasure word plaque before gluing it just to make sure everything fits well.
In part three I will go over making the Treasure word plaque, the scrolls and putting it all together. Have a great day! -Lisa

Love this and great instructions. Thanks so much
LikeLike