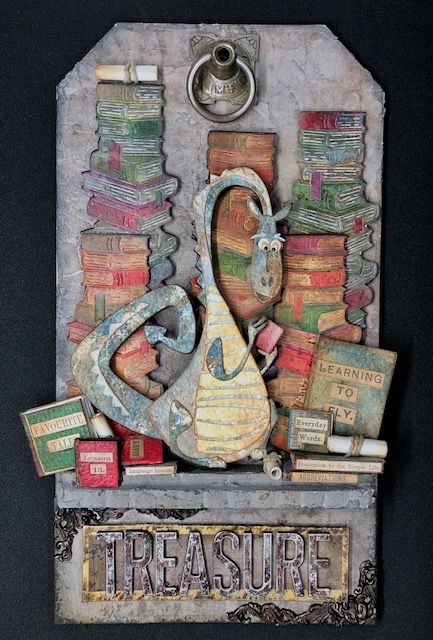

Hello everyone! This week, I finished my Rupert project. It has quite a few steps/techniques so I thought I’d break it into parts. In this part, I’ll talk about how I made Rupert and all of his books. I’m just going to list the products I used in each individual part to make it less confusing. Enjoy!
Rupert and Books
Materials:
Tim Holtz/Sizzix Colorize Rupert (665361)
Hero Arts Fancy dies -D1872 Stacked Books
Tim Holtz Idea-ology Fabric Tape (TH94041)
Distress Inks- Various Colors – I will list specific colors in some of the steps
Tim Holtz/Ranger Cracked leather card stock
Watercolor card stock
Tim Holtz Clippings Sticker Book-TH94030
Ranger Ink Collage Medium
Water brush
Steps:
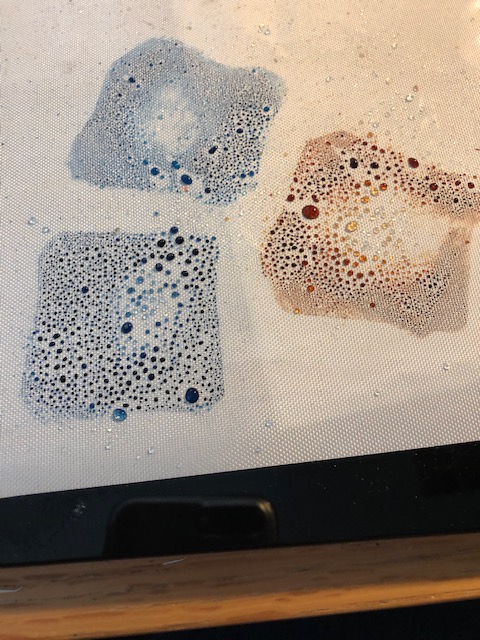
- Make Rupert. I used three sheets of cracked leather card stock. The paper I had was the 4.25″ x 5.5″ size. I colored each sheet the same way, just using different colors. I “smooshed” the ink pads onto my media mat, sprayed them with water and dipped the paper in it. I dried in between layers with my heat gun, and continued “smooshing” and dipping until I liked the result. Colors for each panel are in the caption beneath the photo.
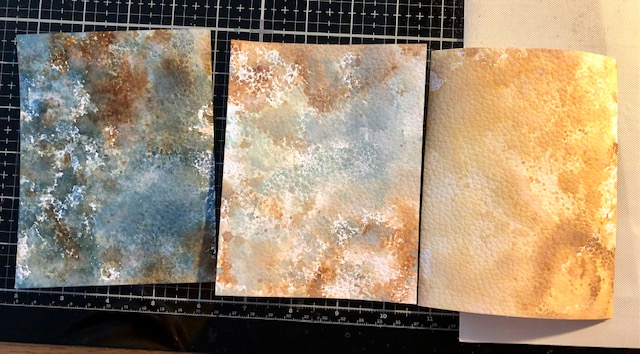
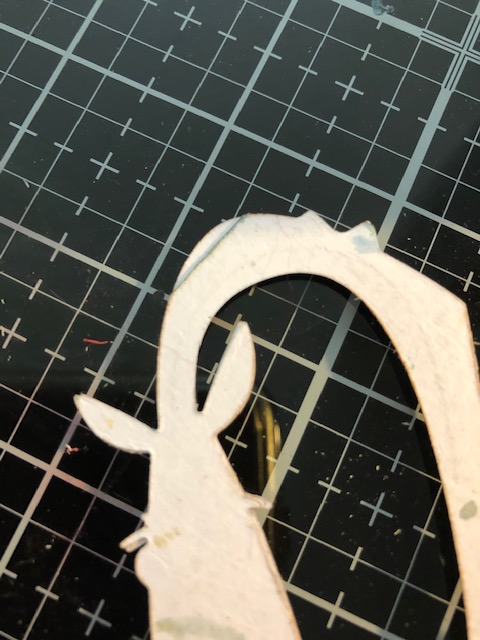
The base of Rupert is cut from the darkest panel, as well as his arm and leg The middle panel was used for the lighter areas and the yellow was for his belly. The way the dies are arranged the belly and the face would have been out of the yellow. Instead I cut an extra face from the darkest panel. Note: On this size of paper, the base die piece is every so slightly too big to fit on the paper, so you need to arrange the die so that the part of the die that gets chopped a bit is under the next layer and won’t be seen when assembled. This card stock does come in an 8.5″ x 11″ which would eliminate this issue. Be sure to keep your scraps as we will use them for books!
Sizzix has wonderful video tutorials for their Colorize Dies so be sure to check them out.
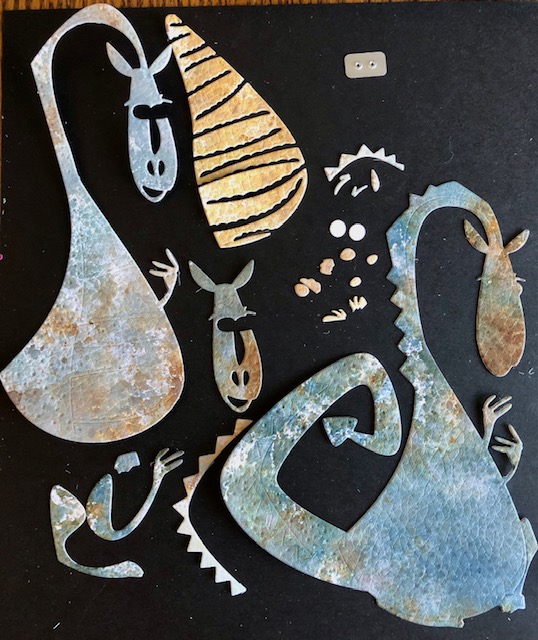
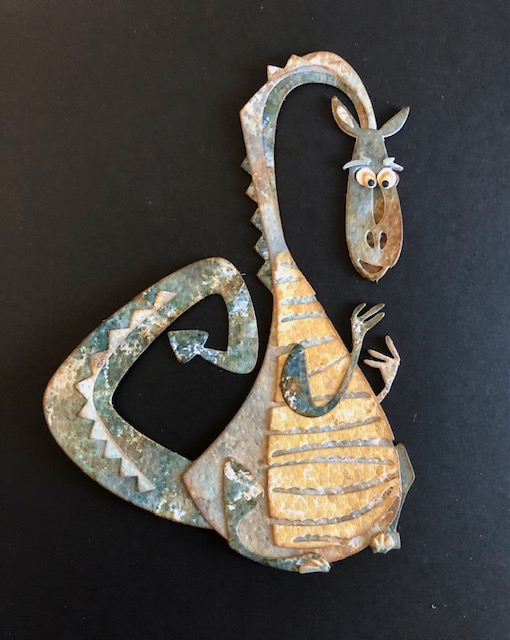
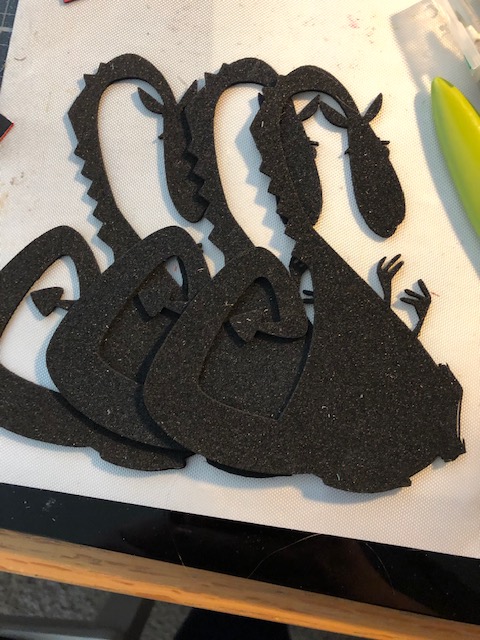
Next, I made Rupert sturdier by adding three layers of foam to him. A nifty trick I have learned is to use fun foam. You can get it at most craft stores. It is a thin foam that you can die cut! I used the largest die to cut several layers and ended up using three. I also brushed him with a thin layer of collage medium to give him sheen and protect his colors.
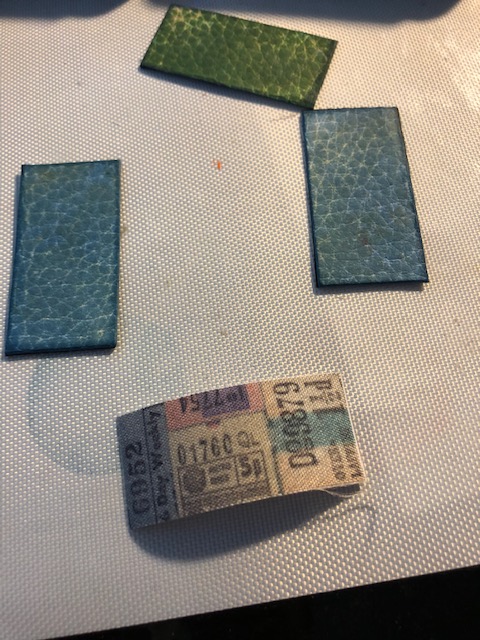
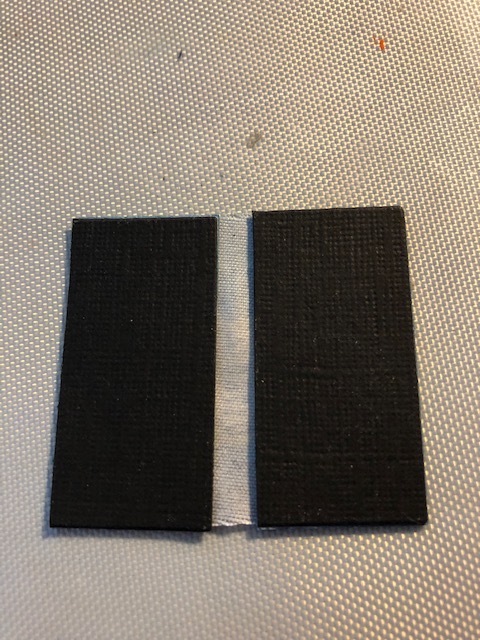
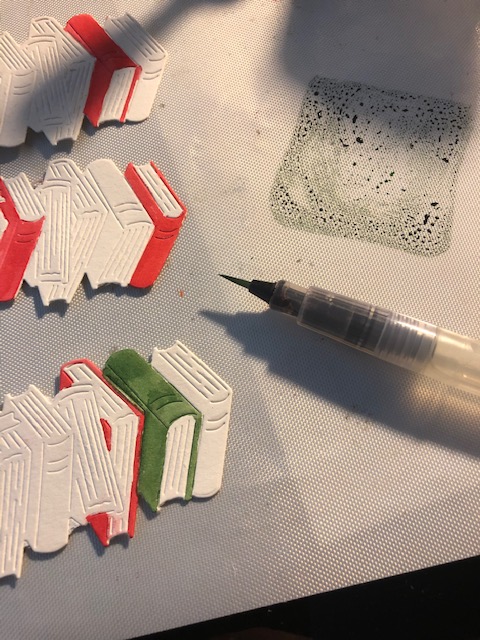
2. Books. Using the scraps from Rupert, I inked sections of the card stock in different colors, using an ink dauber, then cut squares of various sizes out of the sections. Each square, then gets cut in half. Ink those edges!


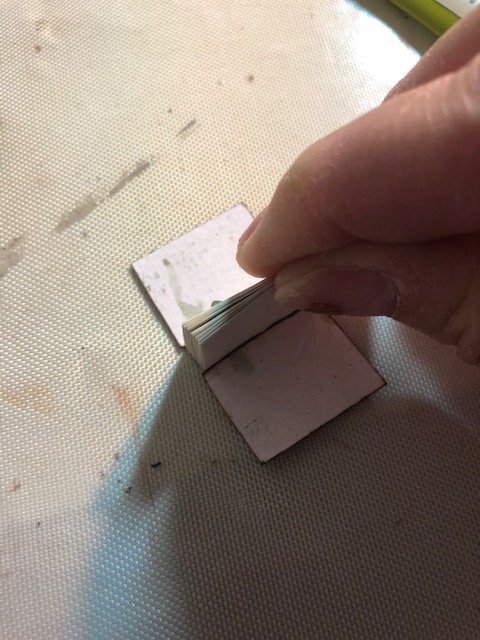
Next, lay a small piece of fabric tape, sticky side up on your work surface. Lay your covers so that they overlap the tape, leaving a space in between the covers. The distance you leave with determine how “fat” your book is. Keep in mind the larger the space the more “pages” you will have to add to fill it.
Cut several pieces of paper ( I used copy paper. It is thin and easier to use than card stock for this). Cut each piece the height and width of your taped book and fold each page in half. Once you have a nice stack of folded papers, gather them up and adhere them as a unit (folds towards to spine of book) to the center where your tape is. If you would like to make sure it is adhered well, you can add a line of glue to the exposed fabric tape.

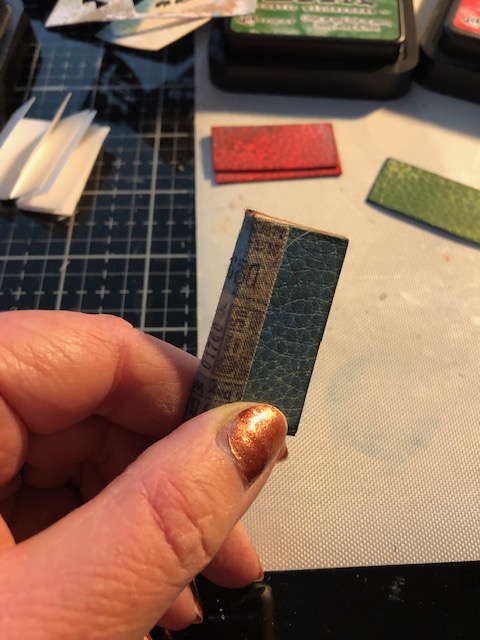
Make several books of all different sizes. Be sure to ink the edges of the books as well as their pages. You can add different clippings as titles, inking the edges of the stickers and using a little glue to make sure they stay stuck.
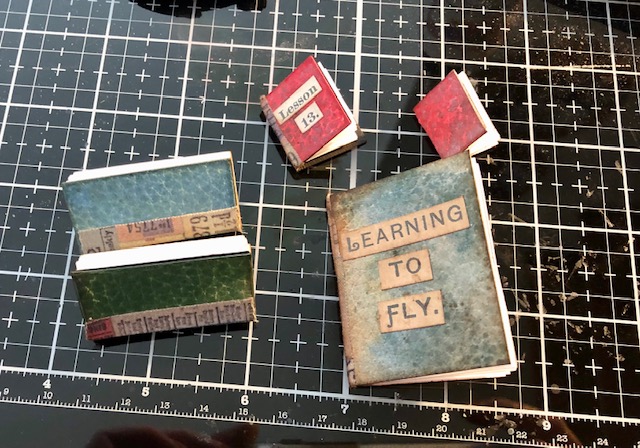

The book Rupert is holding is actually just a 1/2″ x 3″ piece of leather card stock folded in half. The way his hands are positioned makes it difficult to have a fully made book with pages there. I ended up making several more books in the same way, in different sizes. I painted them all with a thin layer of collage medium. It gets a little addictive!
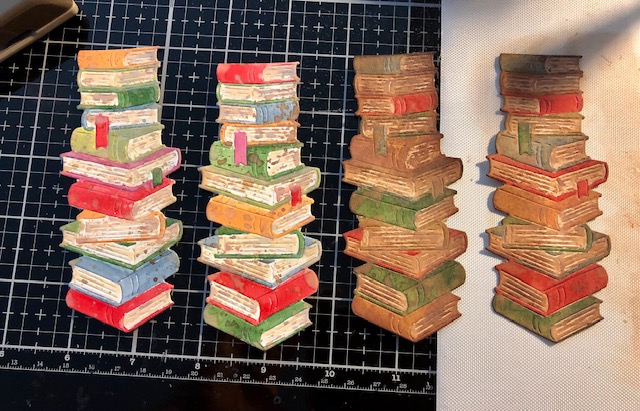
Background books. These books are a bit easier as they are cut with the Hero Arts die from watercolor paper. I used various distress inks and a water brush to paint the books. Next, I “smooshed” Vintage Photo ink on my media mat, spritzed it with water and dipped the book stacks just a bit. Then I went over them with either Black Soot or Vintage Photo inks to “age” them up a bit. Finally, I painted them with a thin layer of collage medium
Whew! That is the end of part one. Part two will cover the “Treasure” sign featured on the bottom of the piece. Then, in Part three I will go over covering the etcetera tag, the ledge and putting it all together! Have a fantastic day everyone! – Lisa

Oh Wow! I can’t believe you made all this adorable books too, so awesome 👏🏻
LikeLike
Love it!!
LikeLike
Rupert + books = win, win! I love it!!
LikeLike
Thanks very much!
LikeLike