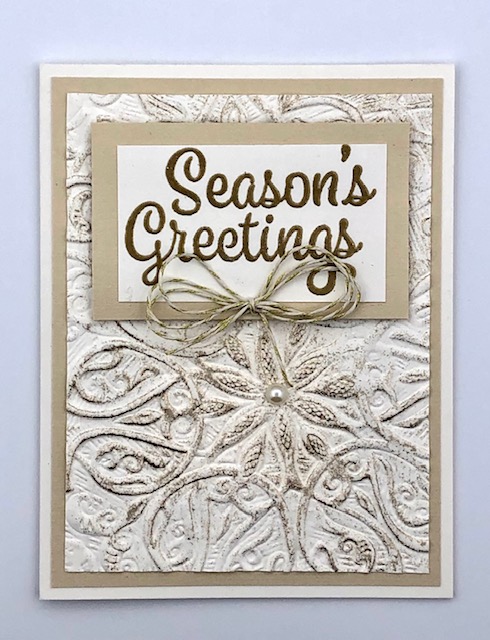
Hello everyone! I have a simple card for you today, using the beautiful Tim Holtz Engraved embossing folder. This is a nice card for mass producing if you have a lot of recipients that actually looks prettier in person. The gold really doesn’t show well in photographs.
Materials:
Buttercream or Ivory card stock
Gold card stock- this is La La Land card stock GC10. It’s a very subtle, pretty gold
Tim Holtz Engraved 3D embossing folder – 664249
Stampin Up! Snowflakes sentiments stamp – this may be a retired one but any sentiment you like will work
Stampin Up! Star of Light snowflake die- again possibly retired but any small snowflake die will work
Creative Expressions Golden Sand Kiss glitter kiss-CSGKSAND
gold embossing powder
Fun Stampers Journey thread gold- AC-0205
clear embossing ink – ie. Versamark
pearl accent
Steps:
- Make a card base for a standard 5 1/2″ x 4 1/4″ card out of buttercream card stock.
- Cut a mat out of the gold card stock to measure 5 1/4″ x 4″. From the center of this mat cut a small mat measuring 3 1/4″ x 2″ ( this is optional for saving card stock, as it won’t show under the embossed piece. If you would rather not cut out the middle of this piece, just cut another piece from a separate piece of gold card stock. Also, these measurements are for the sentiment I used- yours may vary depending on the sentiment you use)
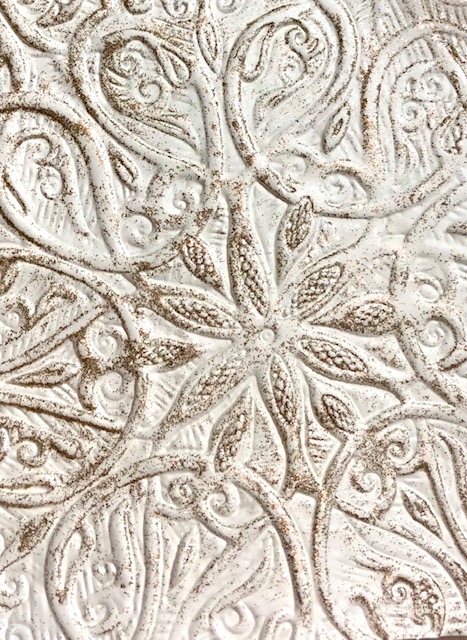
- Emboss a 5″ x 3 3/4″ piece of buttercream card stock using the Engraved 3D embossing folder. It is recommended for these types of folders to spritz your paper lightly with water before embossing and to run it through a few times to really get a good impression. After it is dry, rub a bit of the golden sand kiss over the surface of the piece, using the foam applicator that comes with the kiss. Let dry.
4. Stamp your sentiment with clear embossing ink, onto a piece of buttercream card stock and emboss, using gold powder. On mine the piece measured 2 3/4″ x 1 5/8″ but use the measurement that works for your sentiment. Mat this onto the gold piece from step 2
5. Mat the embossed piece onto the larger gold mat and attach it to your card base. Pop up your sentiment using foam tape. Add a bow made from the gold twine and the pearl accent in the center of the large snowflake on the embossed piece.
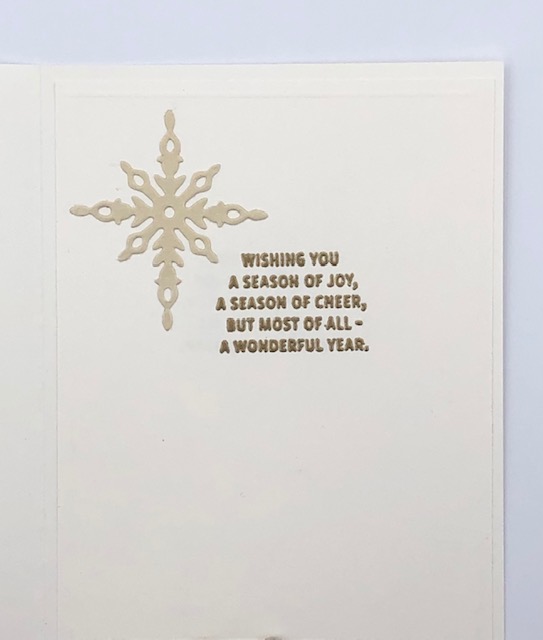
6. For the inside of the card, I cut a piece of buttercream card stock 5 1/4″ x 4″. Using a score board I scored a line 1/8″ along all sides of the piece (this is optional, I just like how it looks). I stamped a sentiment, embossed with more gold embossing powder, slightly offset to the right, and added a snowflake die cut from the same gold card stock. Attach this to the inside of your card.
That’s it! A pretty simple card that looks lovely I think. I hope you like it and give it a go. Have a great week everyone! – Lisa
