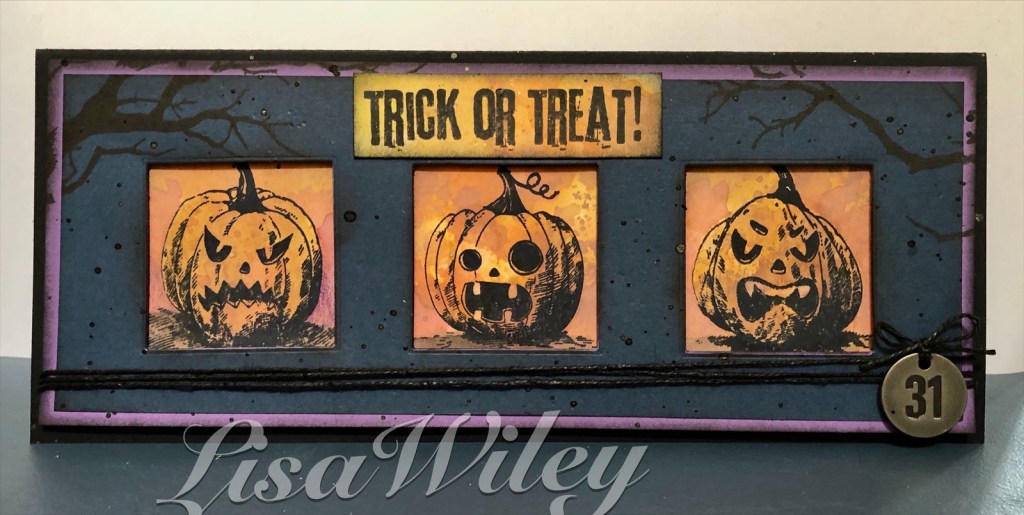
This week, I’ve been working on a large Halloween project. I knew I wasn’t going to get it finished in time for the blog, so I decided to make a quick Halloween card for the blog this week. This is an older set, but I still love it. Hope you do too!
Materials Used:
Pumpkinhead (CMS309)
Mr. Bones (CMS345)
Distress Oxides in Rusty Hinge, Peeled Paint, Vintage Photo, Seedless Preserves
Distress Ink in Black Soot
Stacked Tiles, Squares (664438)
Tim Holtz Halloween word token (mine is old, the new one is TH94064)
Distress crayons in Rusty Hinge and Black Soot
Ranger Archival ink in Jet Black
FSJ Black Licorice Silk IP-0143
FSJ Black Licorice Twine
Mixed media card stock,and Black, Navy and purple card stocks
Distress micro glaze
Steps: Remember to distress all of your edges. This time I used Black Soot
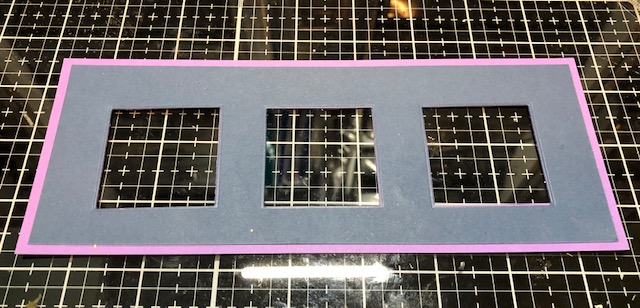
- Make a slimline card base from black card stock, 8 1/2″ x 7″ and fold in half at 3 1/2″, for a final base of 8 1/2″ x 3 1/2″. Cut the purple layer to 8 1/4″ x 3 1/4″ and the navy layer to 8″ x 3″.
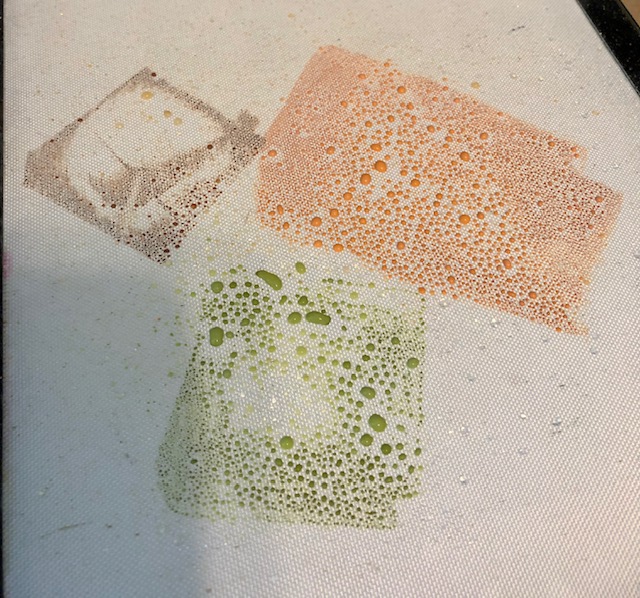
- Smoosh Rusty Hinge, Peeled Paint and Vintage Photo oxides on your mat and spray with water until droplets form. Then dip your mixed media sheet several times in it, drying between layers until desired effect.

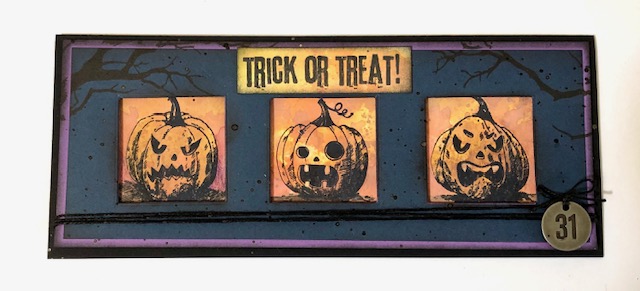
After it dries, use black archival ink to stamp three of the pumpkins from the Pumpkinhead stamp set directly onto the mixed media sheet. I used a stamp positioner so I could stamp them several times to get them really black.
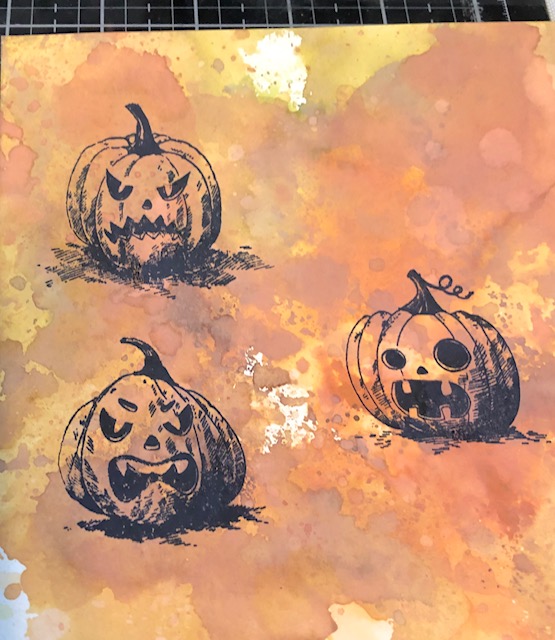
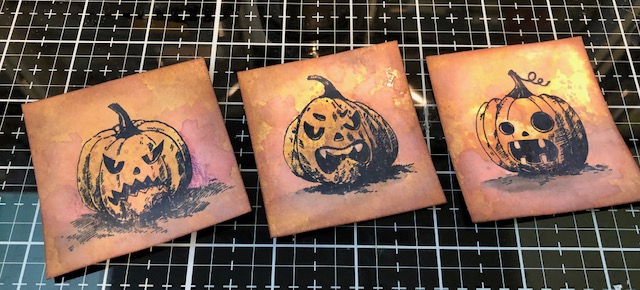
Cut them out, making an approximately 2″ square from each one

Add some shadows using Seedless Preserves and Vintage Photo oxides as well as Rusty Hinge and Black Soot Distress crayons and a water brush.
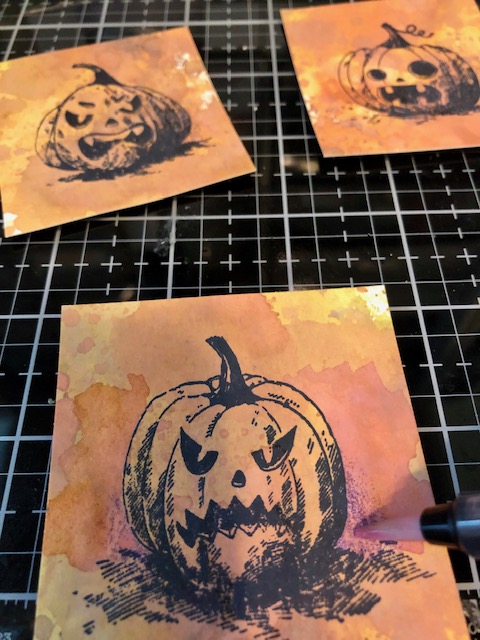
Finish by rubbing distress micro glaze only on the pumpkins not on the background at all. I used a mini blending foam for this step.
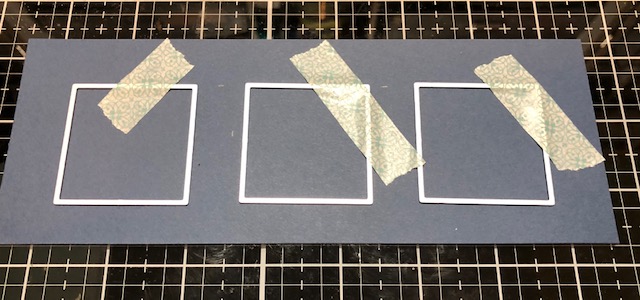
3. Use the largest squares (1 5/8″) from the stacked tiles set and line three of them up on the navy card stock. I went about 3/4″ from one long side and from each short side , then centered the middle square between them. One long side will be slightly wider than the other- this will be the top. Die cut them out.
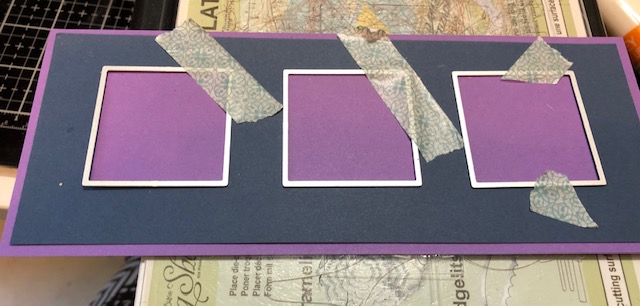
Next, I attached the navy piece to the purple piece and tucked the dies into the cut out pieces on the navy piece (kind of cheating and not sure if this is recommended , but it seemed to work and this way I didn’t have to remeasure everything to make sure it fit). Run this new piece through your machine.
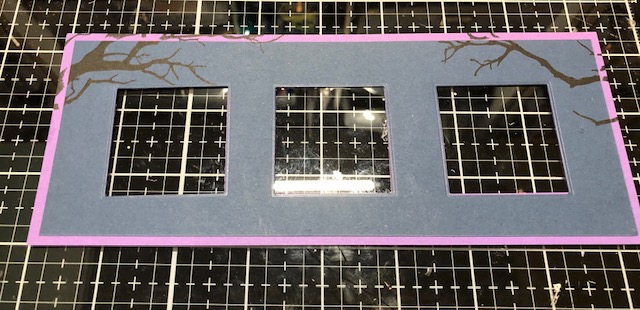
Now, stamp the branch from Mr. Bones on the wider edge. I stamped one side then flipped my card base over to stamp the other branch coming from the other direction.
4. Attach your pumpkins to the card base using foam tape.

4. Stamp “Trick or Treat” onto a scrap piece leftover from your pumpkins ( 2 3/4″ x 3/4″). Distress the edges and attach to the top of the card. Wrap black twine around the bottom of the card three times. Tie a bow onto the word token and attach it to the bottom right corner with foam tape. Cover your pumpkins with the cut outs that came out when you die cut the base if you don’t want them to get splattered. Tap Black Licorice silk all over the card front. If you don’t have silk, you can also use a paint brush with some thinned black paint to splatter it.
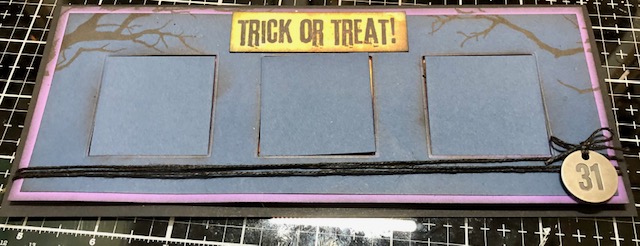
5. Attach your mat piece to the card base with foam tape and the card is finished.
Hope you enjoyed this spooky card. Have a wonderful Labor Day weekend everyone! – Lisa
