
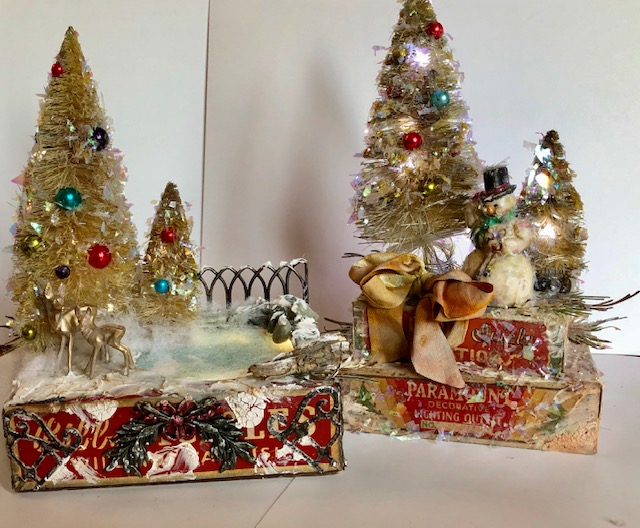
It’s Christmas in July! I know it is early, but I had an idea in my head and I decided to go for it. This little scene lights up (I think I might be getting addicted to tiny lights!). As a bonus, if you follow Stacy Hutchinson over at Tattered Nest Designs (www.tatterednestdesigns), she has directions for a cute snowman vignette that goes well with this. Look for “A Grungy Vintage Snowman”.
Materials:
Tim Holtz/Ranger/Idea-ology branded items:
Vignette box (approx. 5″ x 3 1/2″ size)
Woodland trees- 1 sml, 1 med, 1 large
Tiny Lights
Baubles
Alcohol inks- Crimson, Citrus, Boysenberry, Tranquil (pearl), Mermaid, Gold Mixative, Pitch Black, Mushroom, Moss
Distress glaze in Broken China
Decorative Deer
Distress Pain- Picket Fence, Espresso
Other or Non branded Items:
LaLaLand crafts lattice corner die #8127
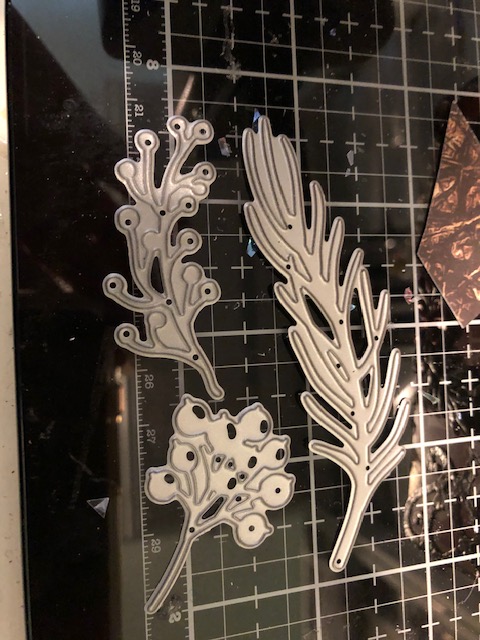
Foliage Dies pictured (unsure of brand)
SU Mica flakes
FSJ white embossing powder
FSJ Modeling Paste
Velum
Rocks, twigs, batting
Spray Oxides- Burlap, Brushed Corduroy
Distress Crayon- Picket Fence
Glitter Duster
Distress glitter in Clear Rock Candy
Texture Paste- Opaque Crackle
Vintage Photo Distress Ink
Alcohol Ink Foil Tape
Metal Gate
Metal Adornment- Nature
Vignette box tops- Christmas
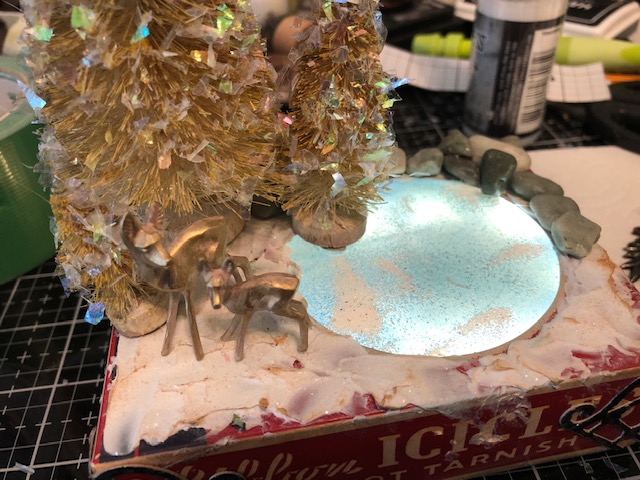
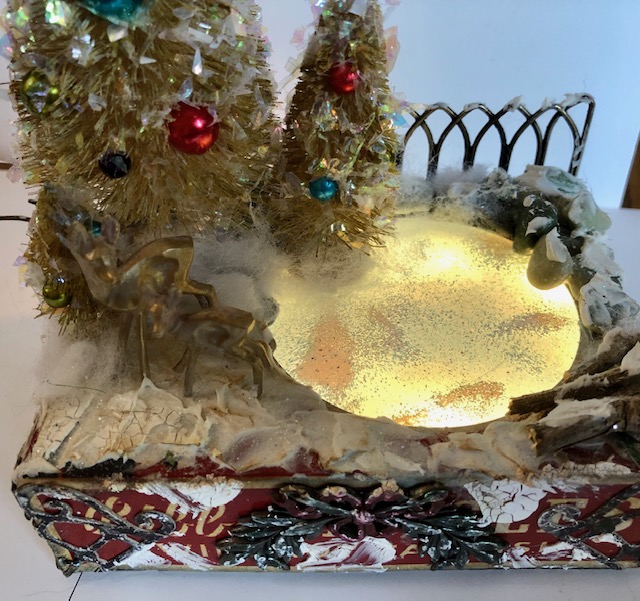
- The lake. On a piece of vellum, use clear embossing ink to cover an area slightly larger than the hole in the top of the vignette box top. Sprinkle some spots with white embossing ink, (tap off excess if you don’t want to mix colors) then cover with Broken China embossing glaze. Tap off excess powder. Heat set carefully, moving your heat gun constantly so you don’t burn or curl the vellum. Add another clear piece of vellum underneath then attach under the hole in the lid of the vignette cover.
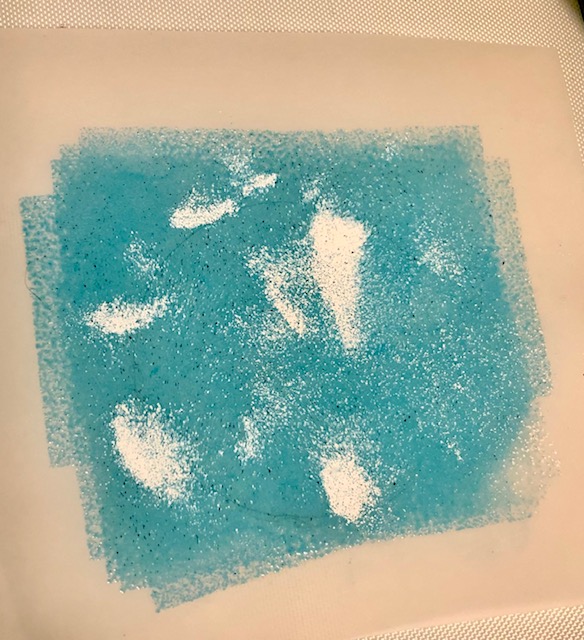

This picture shows a plain piece but I did attach the colored piece first with a plain piece underneath. I think this is when I was measuring.
2. Attaching the lights. Begin by drilling a hole in one of the long sides of the vignette box. Once that is done, make a template out of scrap paper the size of that side of the box and mark where the hole should go on the flap of the vignette box top. Line the scrap paper on the flap and punch a hole in the flap with a hole punch. Thread the light strand through the flap of the box top and through the hole in the box.


Coil the light strand around inside the box. Now you can glue the vignette box top to the box and attach your light switch to the outside of the box with sticky back Velcro.
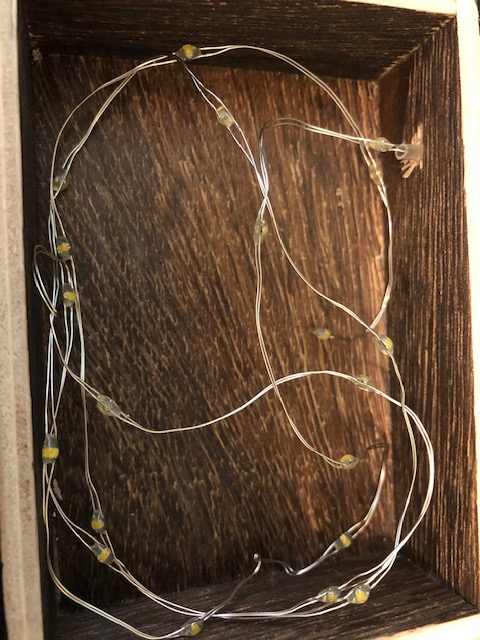
Here is a little sneak peak of how cool the lights look under the glazed lake.
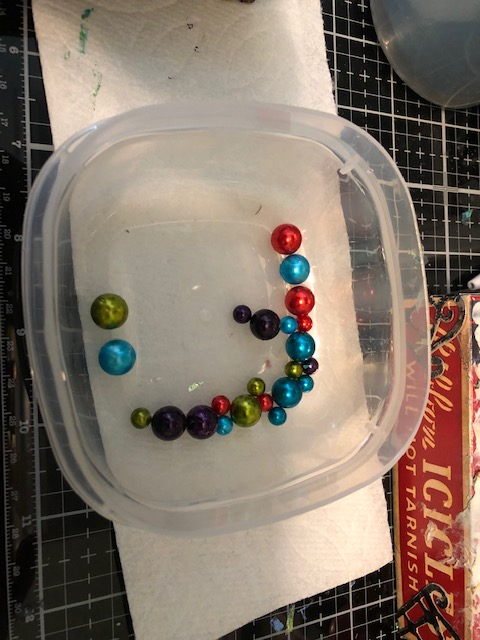
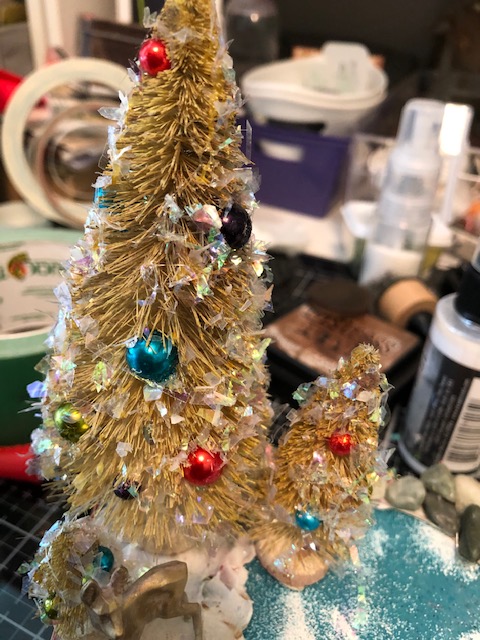
3. Trees and baubles. Lightly spray the three trees with Burlap and Brushed corduroy spray oxides. While wet, you can dust them with glitter using the glitter duster. Let dry. Once dry, rub collage medium over the trees and sprinkle on mica flakes. I just used my finger to rub on the collage medium. While those are drying, dye your baubles. I have mini red solo cups from the dollar store I use for this. Place a few baubles in a cup and drip alcohol inks directly on the baubles, then swirl around until they are coated.
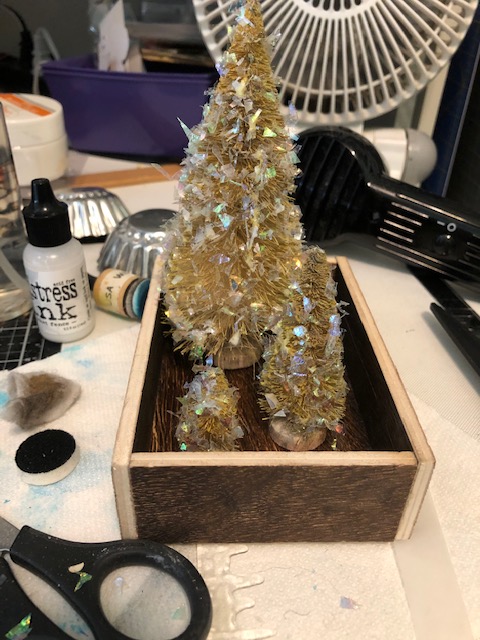
Then I set them out on a paper towel to finish drying.


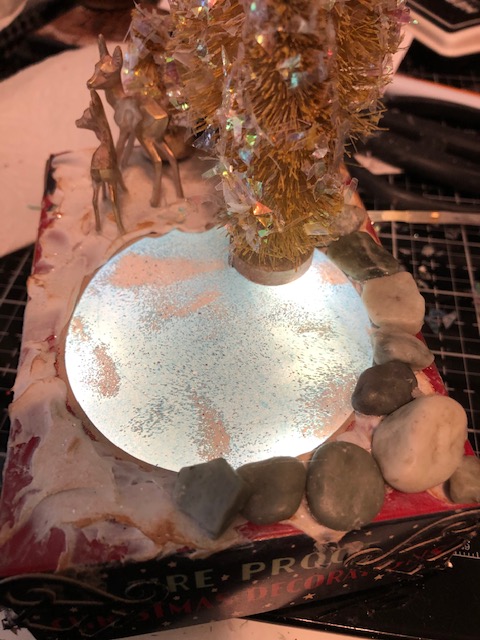
Look how pretty they come out! Once dry you can glue them onto your trees. Using a palette knife, put down a layer of modeling paste to the top of the box. Let dry then glue the trees down to the top of the box.
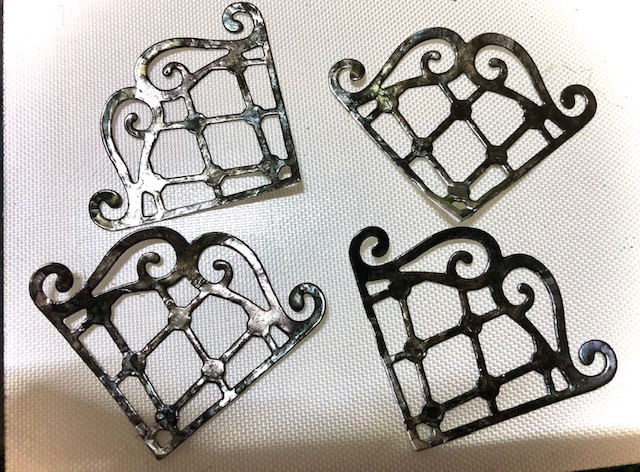
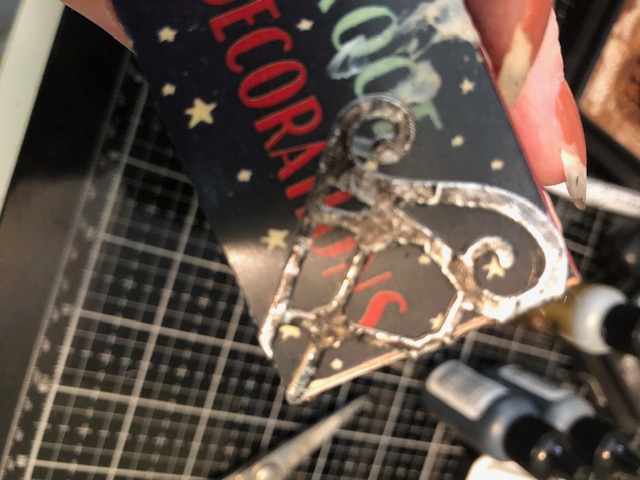
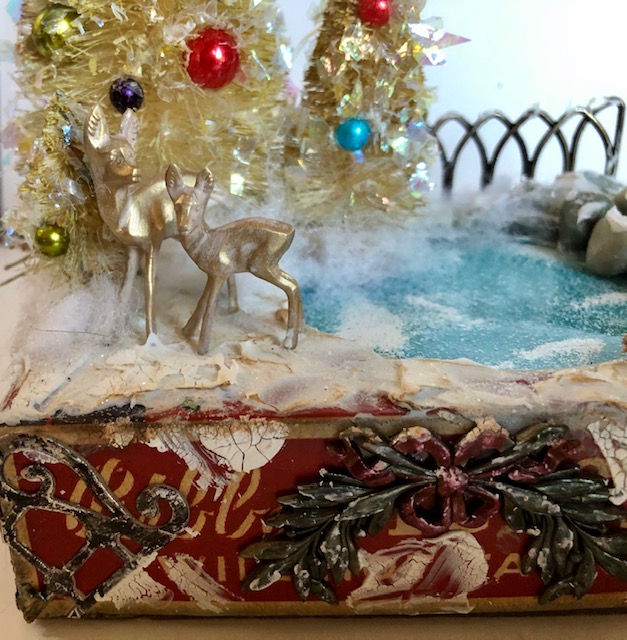
4. Corners. Attach foil tape to some scrap card stock, then die cut using the corner lattice die. Ink the corners up with pitch black and mushroom alcohol inks then lightly sand with some steel wool (see blog post the Professor for details on this). Attach to the corners of the box and trim excess.

5. Deer. Paint the deer with a mixture of Espresso and Picket Fence paints. Once dry, rub them with gold alcohol ink mixative. Dry, then attach to the box.


6. Paint the metal embellishment with Crimson and Moss alcohol inks. Once dry rub Picket Fence crayon over it and rub off excess. Attach to the front of the box.


7. Final touches. Glue a metal gate to the back of the box. Add small rocks, twigs, foliage pieces (die cut and stained with distress inks), small pieces of batting. Add more modeling paste and crackle to areas and lightly stain with Vintage Photo distress ink.


All finished!
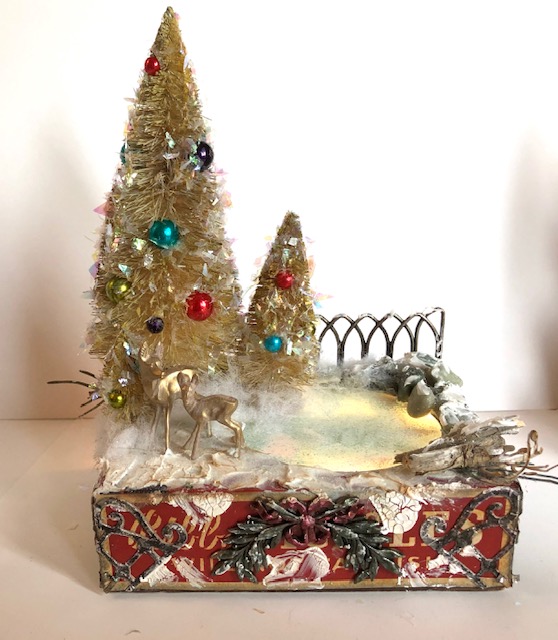
I followed Stacy Hutchinson’s tutorial and made my own grungy little snowman. Look how cute they look together.

I hope you enjoyed this tutorial and make your own little Christmas scenes. If you have any questions or comments feel free to use the contact form. Thanks! – Lisa
