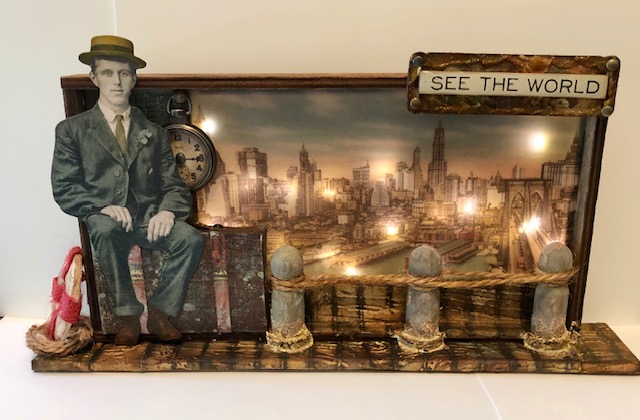
Hello friends! I am excited to share my first blog post with you all and it is going to be a long one! This vignette piece all started with a Tim Holtz paper doll that reminded me of my late father. I knew I would have to use him in something. My father’s family were immigrants from Sicily, fishermen and restaurant owners, so I knew I would have to do something that looked like a dock. I’ve been playing with Tim’s vellum scenes and tiny lights and it all came together in my head. I hope you enjoy this step by step tutorial and don’t get discouraged by the number of steps. Although this project is time consuming it is not difficult.
Materials Used: (All Tim Holtz branded- Ranger/Idea-ology/Sizzix unless noted)
Paper Doll
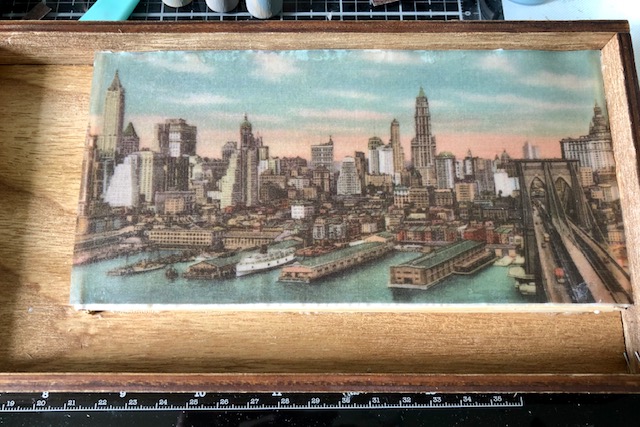
Vignette Tray (9″ x 4 3/4″ size)
Distress Inks : Vintage Photo, Walnut Stain, Black Soot
Oxide Inks: Peeled Paint, Fossilized Amber
Distress Crayons: Walnut Stain, Vintage Photo, Antique Linen
Vellum Scenes
Paper Stash- Abandoned
Ticket Book
Quote Chips
Other items from my stash not TH brands:
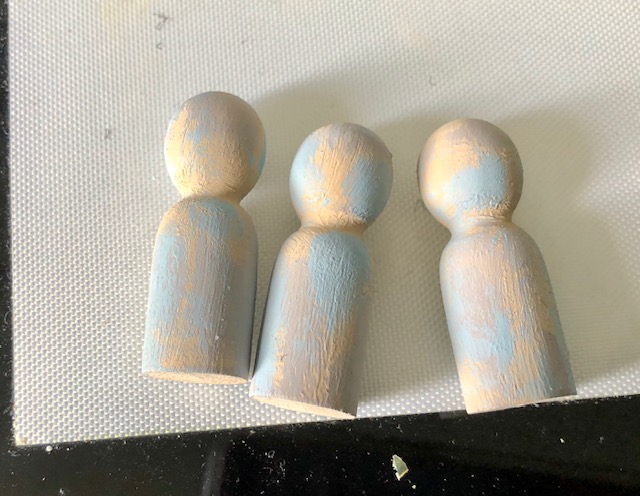
FSJ Modeling Paste, Twine, Circle Dies (largest 1 7/8″), wooden dowels, plain vellum, red scrap fabric from a strap, wooden “people” (Art Minds- 0.6″ x 1.6″), chipboard, watercolor paper, brads
Texture Paste- Opaque Crackle
Embossing Folder: Woodgrain
Collage Medium
Embossing Glazes: Speckled Egg, Fossilized Amber, Peeled Paint, Cracked Pistachio
Embossing Ink dauber and pen
Salvaged stickers- crowded attic
Tiny lights
clock sticker from Curiosities sticker book
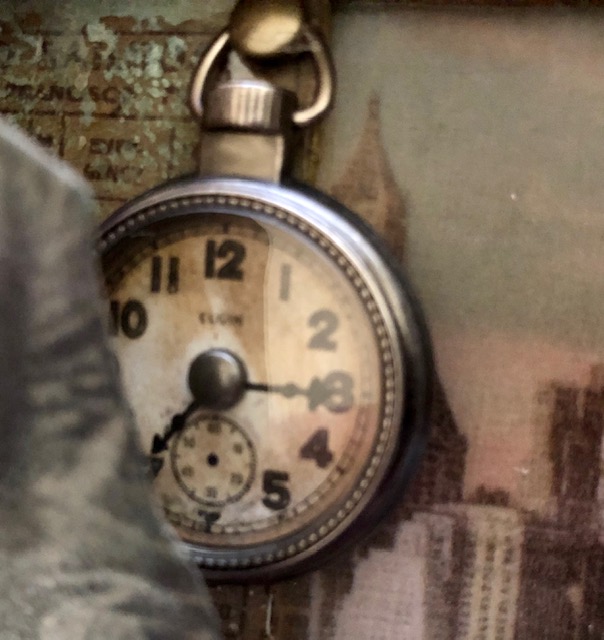
Pocket Watch (1″ diameter)
Distress Grit-Paste Translucent
Part One: Construction:
To use the tiny lights with the vellum scenes you need something the vellum scene can rest on above the lights.
- You can use several different things to prop your vellum up. In this instance I used wooden dowels cut to the length and width of the vellum scene I chose. I stacked (2 high) and glued several dowels together in the tray to form a box.
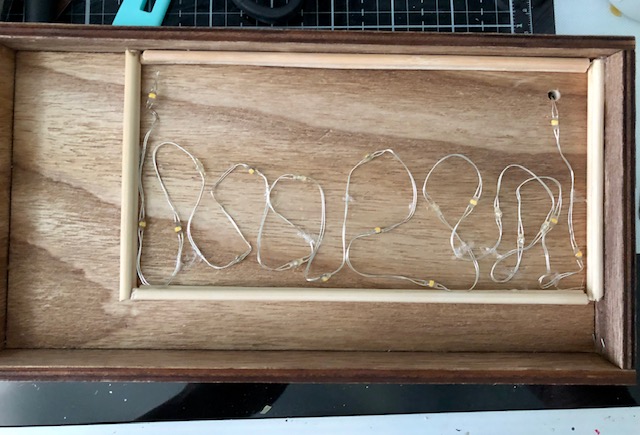
2. I drilled a hole in the upper right corner to thread the lights through and coiled them along the bottom edge of the box approximately where the buildings are in the scene. You can glue the light strand in parts to get it to lie flat but do not put glue directly on the bulbs.
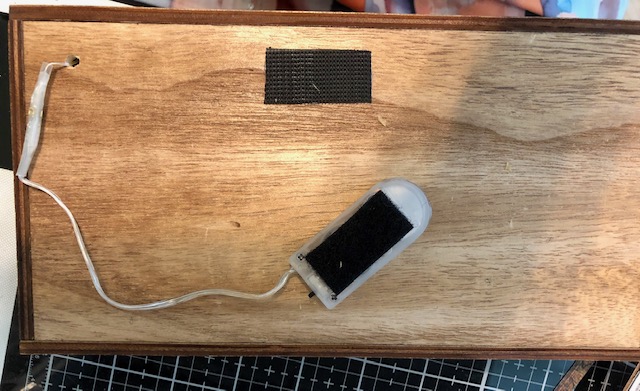
3. I attached velcro to the back of the tray and to the battery pack for ease of use and changing of the batteries when needed.
4. I chose to add a plain piece of vellum to the back of the scene to give it a softer glow.
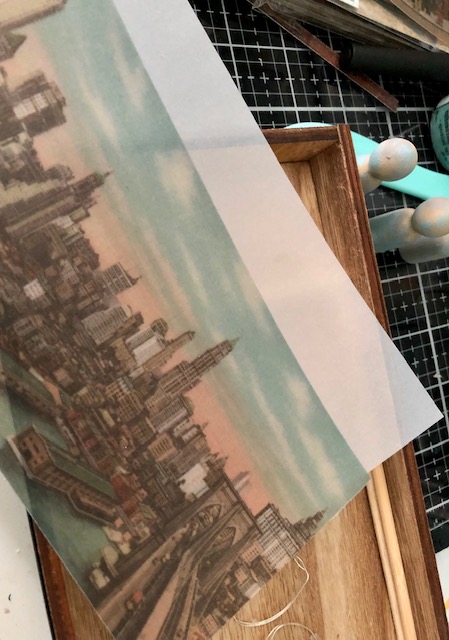
Then, I glued both pieces in place on top of the dowels.
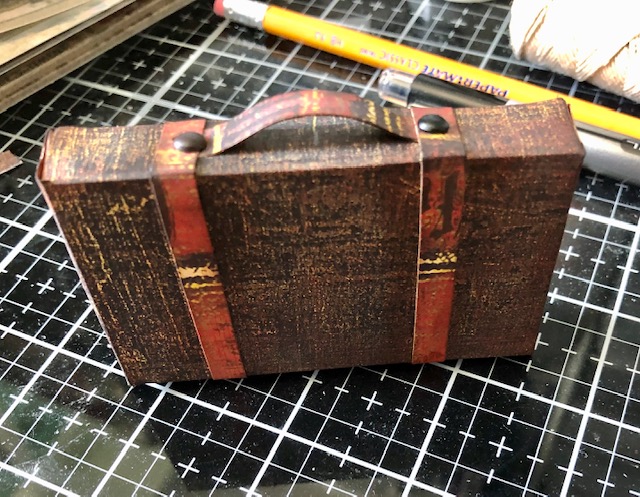
5. The suitcase. For some reason this step took me a long time, but now that I figured out the measurements needed, it is easy =). For my suitcase, I chose a sheet of paper out of the Abandoned paper stash that looked like fabric or leather. You need a piece 4″ x 5 1/2″. I just made a simple box by scoring 1/2″ on all sides and at 2 1/2″ and at 3″ (or 2 1/2″ from each end). Snip the tabs in the corners and fold into a box.

You can trim your tabs for neater corners. It will look like this:

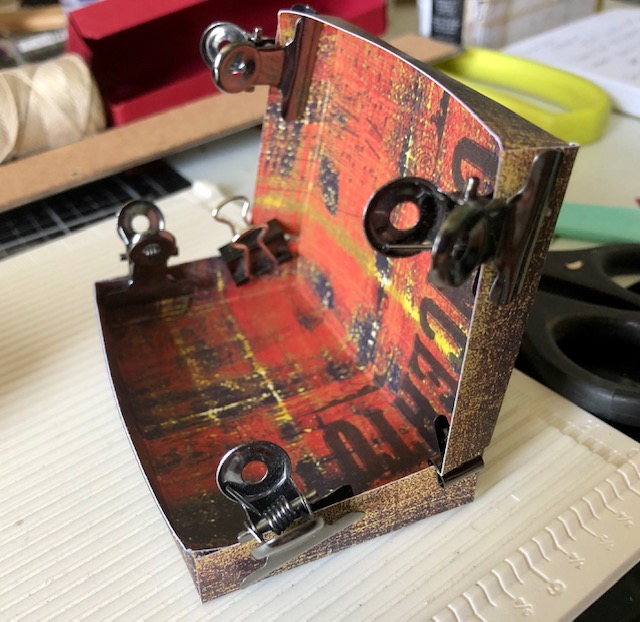
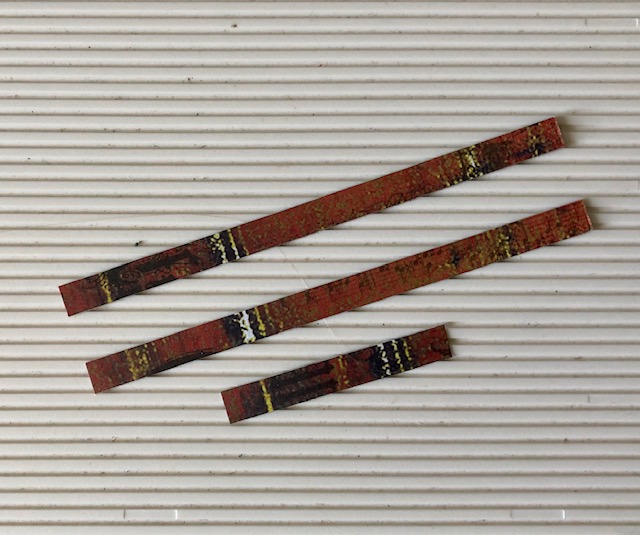
Note one side has four full sides and one has three. I like to use clips to keep it all together while it dries. After the sides are dry, glue the box together. This particular paper as you see has red on one side with lines. I cut three 1/4″ strips to use as straps on the suitcase. The smallest strap is about 1 1/2″, while the two longer straps are about 3 1/2″-4″. Note the straps don’t have to go completely around as the back of the suitcase won’t show.
Curl the short strip slightly and center it on one end of the box. Glue. Then begin wrapping the long strips around the box.
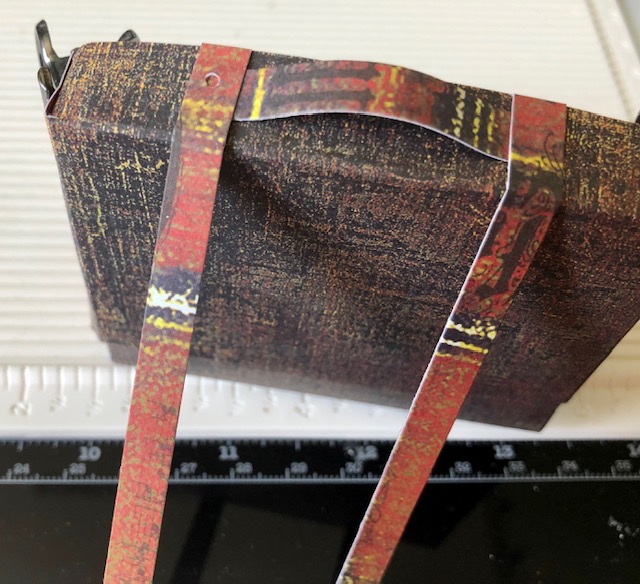
Glue brad heads to the ends of the handle and the suitcase is done!
6. Because I wanted my paper doll to sit on the outside of the box, I built up the left side of the tray with scrap pieces of chipboard. This way the large ticket we will glue here will sit flush with the vellum scene.

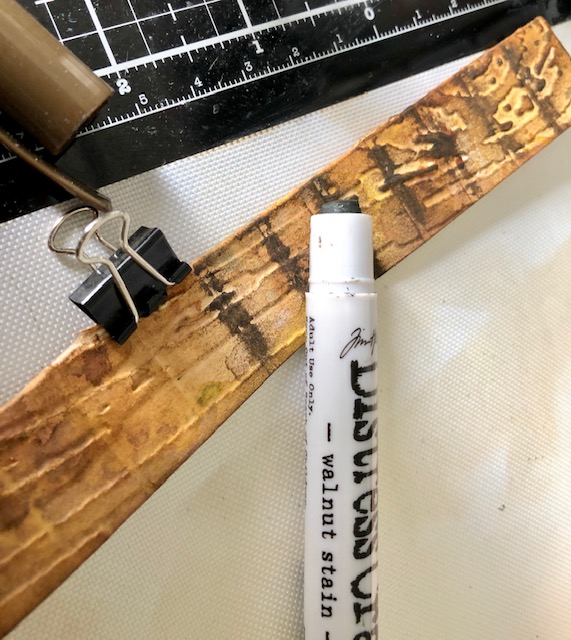
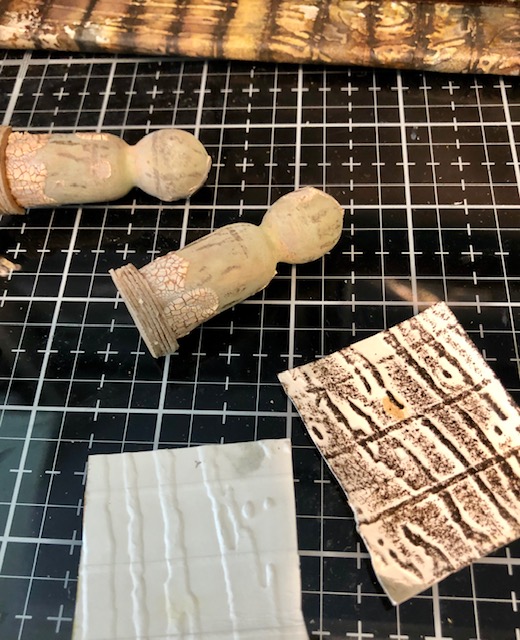
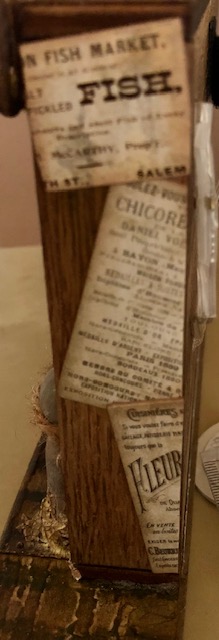
7. Time to build the dock. First I cut a piece of watercolor paper the length of the vellum scene (about 7″) x about 1 1/2″. This is wide enough to span the bottom of the scene, run along the base of the tray and under the tray slightly. I used distress inks (Vintage Photo, Walnut Stain, Speckled Egg, Peeled Paint) and water, dipping the paper in the inks until I got a nice variegated background. When it was dry, I embossed the paper using the Woodgrain embossing folder. Then to create “planks”, I scored this paper every 1/2″. Finally, I rubbed these score lines with Walnut stain distress crayon and used my finger, dipped in water, to blend out the lines a bit. Be careful when embossing/scoring as the paper gets a bit fragile from working it too much. Dry fit this piece to the tray, fitting along the bottom of the vellum scene, noting where you need folds to go along the bottom of the tray and over the edge. Once you have found where the fold needs to be, you can score it if you like. Glue this piece along the bottom of the vellum scene, along the bottom of the tray and over the edge of the tray.
For the new base of the scene, I used chipboard pieces cut 10 3/4″ x 2″. I stacked and glued several together for a sturdy base. My chipboard is thin so I think I ended up stacking 5. Depending on the thickness of your chipboard, you might get away with fewer layers. I also cut one extra piece to glue on the bottom to cover all the edges. I repeated the process of coloring, embossing, scoring on another piece of watercolor paper cut to fit this stacked base of chipboard (11 1/4″ x 2 1/2″). You may need to piece some together if you don’t have long enough paper, but you won’t really notice that on the finished project. Glue this paper on your chipboard stack. As you do this process, compare this paper to the one you glued into your tray to kind of try and line up your score lines. You may need to adjust your paper to match.
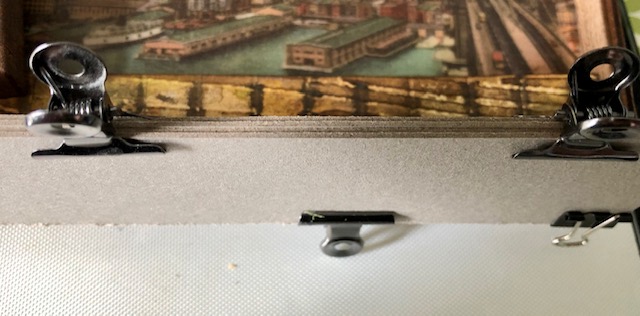
Glue your tray centered side to side, flush with the back of this chipboard “floor”

Part Two: Decorating
- Distress the edges of a large ticket from the ticket book with vintage photo ink. Glue this to the left side of the tray, flush with the top left of the tray and sitting on the left side of the vellum scene.
- Distress your suitcase if you like and glue it to the left bottom corner of the tray.
- Put a brad in the center of the 1″ clock sticker from the Curiosities sticker book, distress the edges and pop this up in the base of the pocket watch with foam tape. I drew clock hands on mine using a fine tip marker. Glue the pocket watch cover in place over the base. Glue the “clock” at the right edge of the ticket in the left corner. I glued a brad head in the upper ring of the watch so it looked like it was hanging from it.
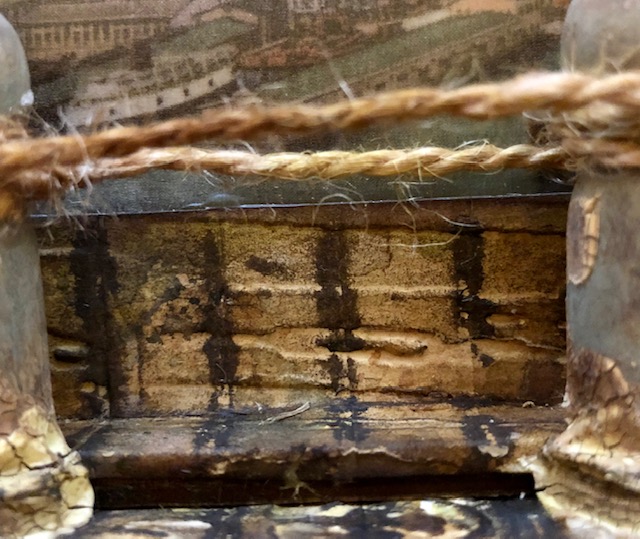
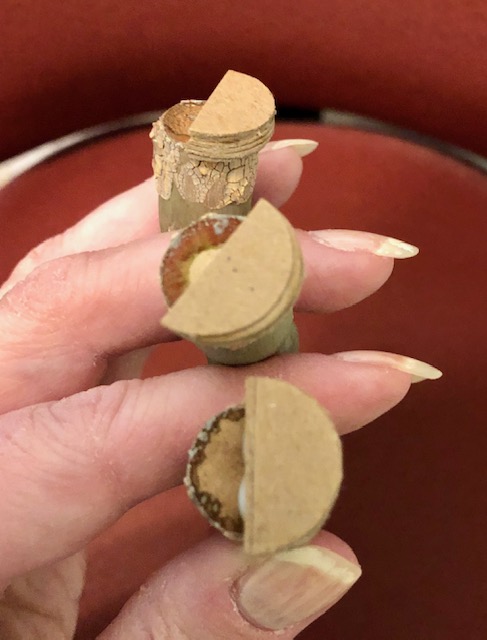
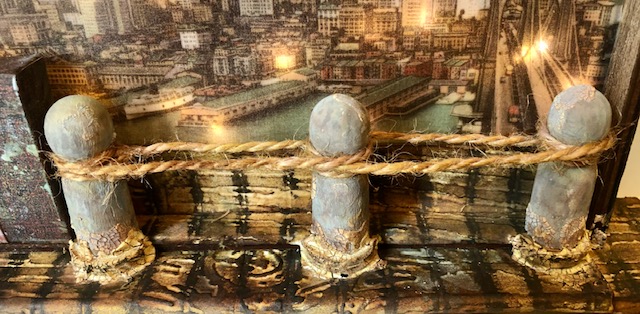
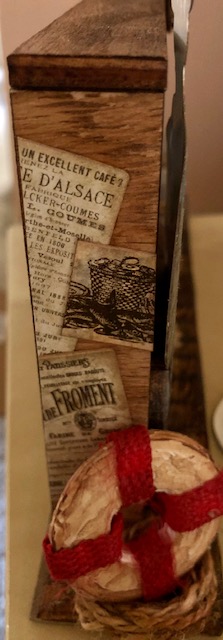
- The “pillars“: I used wooden pegs I found at the craft store. They are marked as “people”. I used speckled egg, vintage photo, and walnut stain to color them. I then cut several small circles of chipboard (3/4″). I cut these circles in half, stacked several and glued them to the bottom of each pillar. The reason for this step is that the pillar sits half on the edge of the tray and half on the new base. The number of circles you will need to stack will depend on the thickness of the chipboard you use.
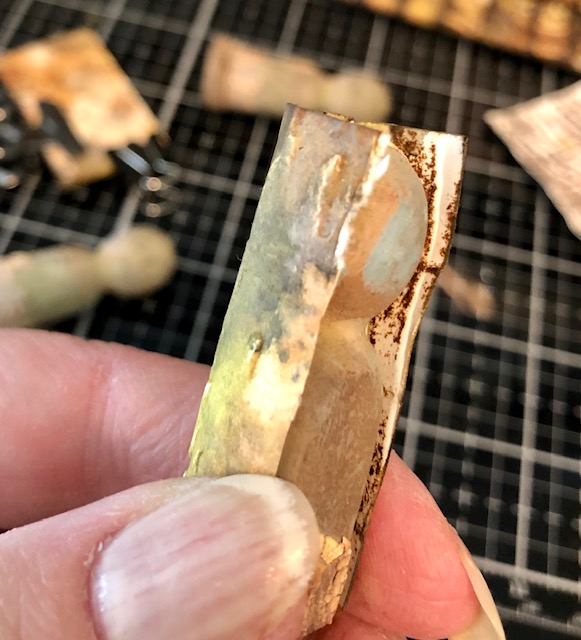
I applied opaque crackle paste haphazardly over the pillars and continued to stain them. As a final touch to make them more “wooden” looking, I used leftover embossed scraps from the dock. I inked the scraps up in vintage photo or walnut stain and wrapped them around the pillars to give them wood grain lines
.
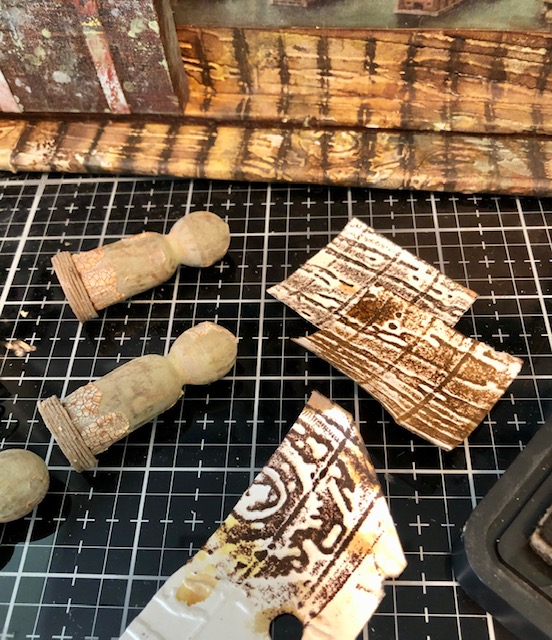
After they were dry, I glued them in place along the dock. I applied more crackle at the base of each pillar and continued to stain and distress them with inks. I then wrapped thick twine that I had stained using distress inks around the pillars.
5. I used the new embossing glazes to color my paper doll. I used an embossing dauber for the large areas and an embossing pen to get ink into the smaller areas. His suit was done in Speckled Egg, his tie in Peeled Paint, his hat in Fossilized Amber and his shoes are in Rusty Hinge. Tim has a tutorial on this process on his blog if you want more details on how to do it, but basically you ink up the area, apply the color and heat emboss. The glazes are translucent so you still see the all the details etc after it is embossed.

Glue him sitting on top of his suitcase

6. Stain another strand of twine and glue it into a coil on the left side of the tray.
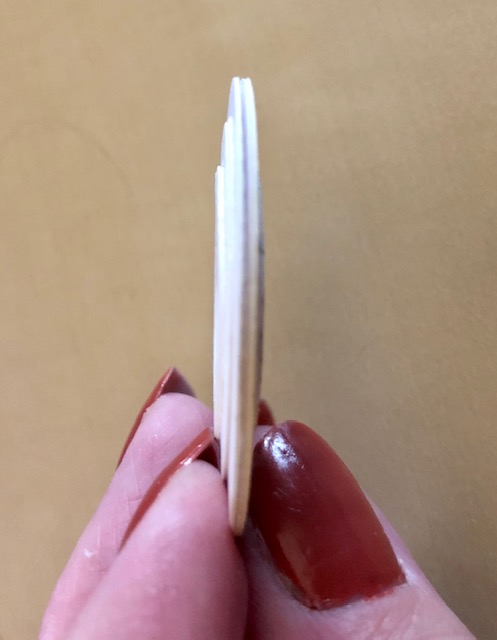
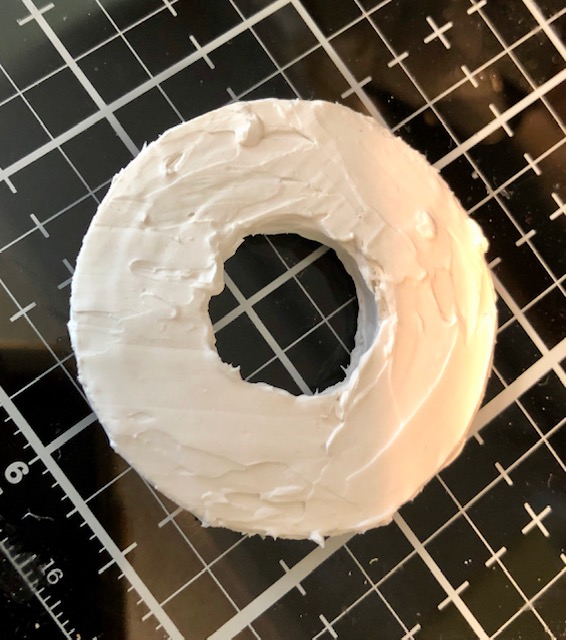
7. The life preserver. This is a bit odd, but stay with me =). For the life preserver I cut several circles out of cardstock- 4 each of 1 3/4″, 1 3/8″, 1″ with a 3/4″ hole punched out of the center of each one. Make two stacks of descending circles using 2 of each circle glued together, then glue these stacks back to back. I scribbled on one to make it easier to see.
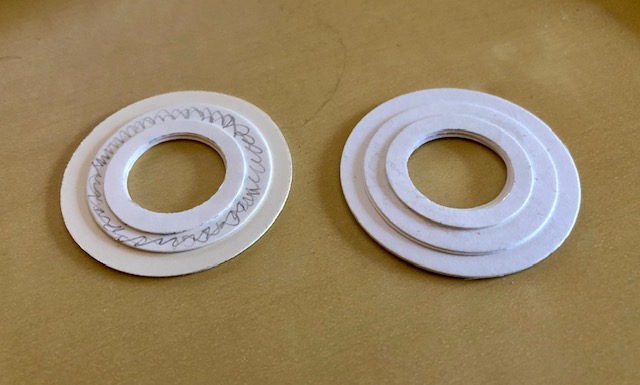
Next, I coated it in a couple of layers of modeling paste, smoothing the edges of the paper circles. The reason for the extra circles was to round it out to look like a real life preserver. My husband thought this was a picture of a bagel …lol
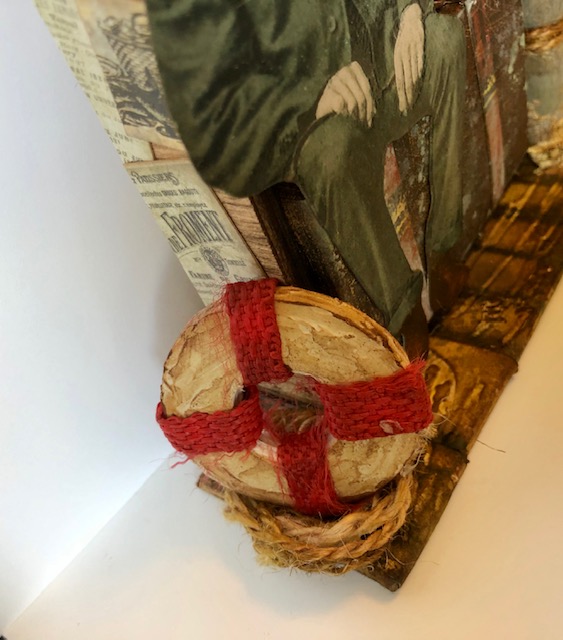
Next, I distressed it with some vintage photo ink. For the stripes I cut some thin strips from the strap of a Target shopping bag, distressed them with vintage photo and glued them on. Then I glued the life preserver on top of the coil of twine on the left side of the tray.
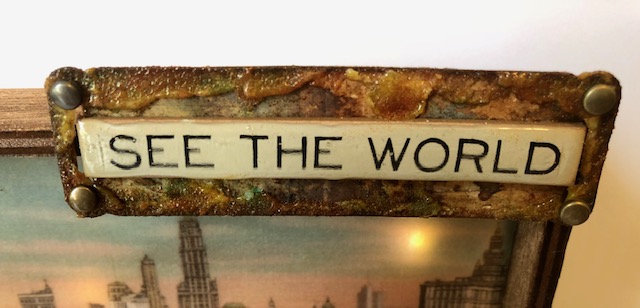
8. For the sign: I chose my quote chip and distressed the edges with Vintage Photo ink. I then coated it with FSJ Journey Glaze (similar to Diamond Glaze or Crystal Effects). For the base I happened to have a tag die the right size, but you can just cut a rectangle to fit whatever quote chip you use. I distressed the tag by dipping it in ink (I used the same colors I used on the dock) spritzed with water. Once it dried I coated the edges with Translucent Grit- paste and sprinkled the pasted areas with distress glazes in Rusty Hinge, Fossilized Amber and Cracked Pistachio. Make sure your paste is dry before you heat the powders with your heat gun. I added brads to all four corners and glued the quote chip on top. This got glued to the top right corner of the tray.
9. All that remained was to cut a few sticker signs from Salvage Stickers-Crowded Attic, distress the edges and add them to the side of the tray.
Whew! All finished. I hope you enjoyed this tutorial. If you have any comments or questions you can use the form on the contact me page. Thanks for checking out this long tutorial. I’ll try and make the next one a little shorter =D
Hugs!

Oh my gosh how well documented and steps photographed. I am so impressed and envious of your talent. Tim Holtz and the Ranger Community are sure to be pleased time and time again. Thank you for sharing your awesome project and congratulations on your very first blog post Lisa!
LikeLike
Thanks so much, my lovely friend ❤
LikeLike
Just WOW! I envy your ability to visualize and carry out such a masterpiece. Such a talent
LikeLike
Holy smokes!! Amazing!!
LikeLike